Difference between revisions of "Creating System DSN ODBC Sources"
Jump to navigation
Jump to search
John.Buckley (talk | contribs) |
John.Buckley (talk | contribs) |
||
| Line 11: | Line 11: | ||
# Select the checkbox ''Change the default Database to''. You will then need to select the database that you are looking to connect to. A common example will be the '''Works''' database.<br />[[Image:Odbc_select_database.JPG]] | # Select the checkbox ''Change the default Database to''. You will then need to select the database that you are looking to connect to. A common example will be the '''Works''' database.<br />[[Image:Odbc_select_database.JPG]] | ||
# Select the ''Next'' button. | # Select the ''Next'' button. | ||
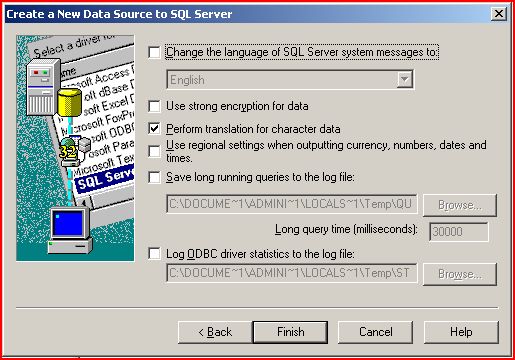
| + | # LEave all of the default settings checked and click the ''Finish'' button.<br />[[Image:Odbc_finish.JPG]] | ||
Revision as of 21:15, 30 June 2008
_TOC__
Windows 2003
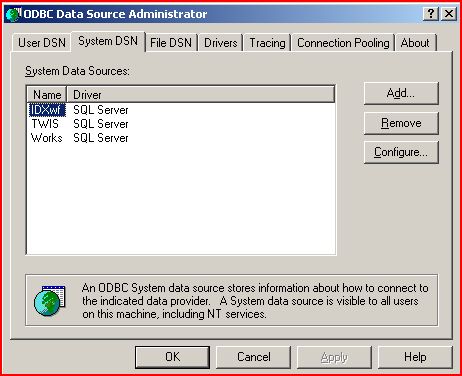
- Select Start -> Control Panel -> Administrative Tools -> Data Sources (ODBC)
- Select the System Tab across the top of the window.
- Select the Add button and select SQL Server (usually near the bottom of the list).
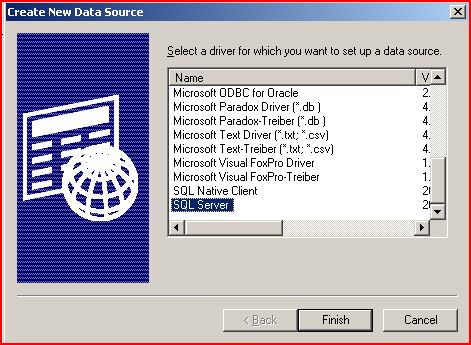
- Select the Finish button.
- Provide a unique Name and Identifying Description and select your SQL Server Host from the drop-down list. Note: You may need to manually type this in.
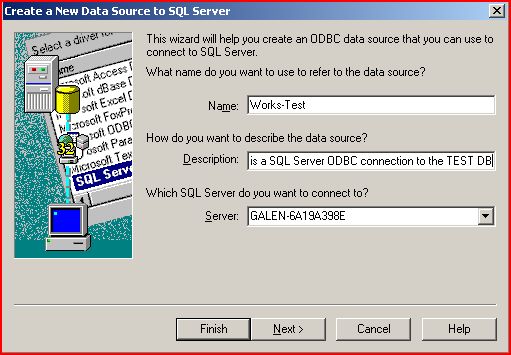
- Select the Next button.
- In most Allscripts systems, when creating a new System ODBC, you will need select the option With SQL Server authentication using a login ID and password entered by the user. You may need to request this information from your support contact.
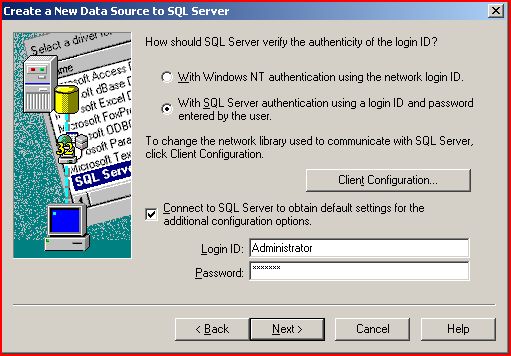
- Select the Next button.
- Select the checkbox Change the default Database to. You will then need to select the database that you are looking to connect to. A common example will be the Works database.
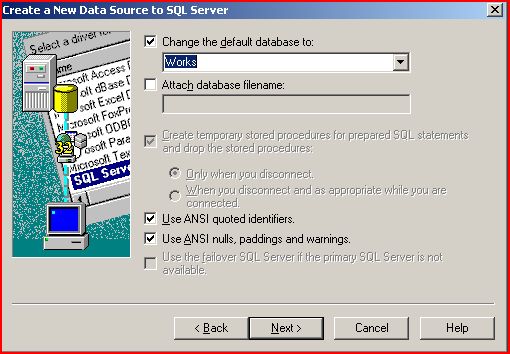
- Select the Next button.
- LEave all of the default settings checked and click the Finish button.