Difference between revisions of "Adding Images and Attachments to Wiki Articles"
Max.Stroud (talk | contribs) |
Max.Stroud (talk | contribs) |
||
| Line 1: | Line 1: | ||
== Overview == | == Overview == | ||
| − | This is a how-to on creating Wiki articles with images/screenshots and attachments. | + | This is a how-to on creating Wiki articles with images/screenshots and attachments. |
| − | |||
== Uploading Files to the Wiki == | == Uploading Files to the Wiki == | ||
Revision as of 20:19, 30 April 2008
Overview
This is a how-to on creating Wiki articles with images/screenshots and attachments.
Uploading Files to the Wiki
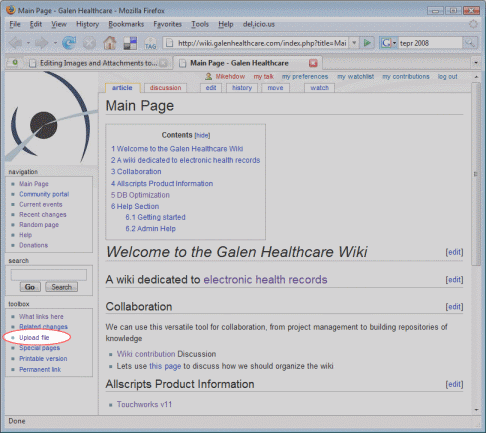
1) Click on the Upload File button in the toolbox on the bottom, left of the screen.

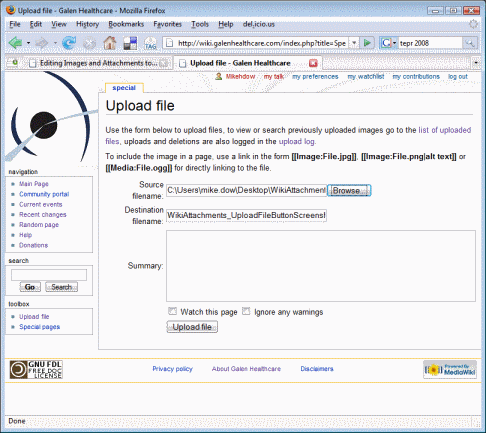
2) Select the file that you would like to upload and click the Upload button.

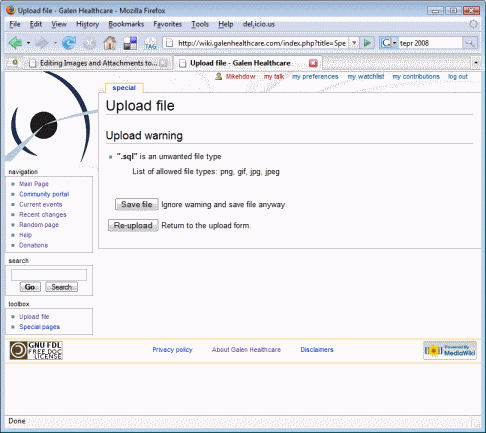
3) If you are uploading a file that is not an image/screen shot, you may receive this warning. Just click on the Save File button

4) If you are uploading a file that is not an image, you will need to copy down the address (URL) of the file after it is uploaded. Immediately after uploading the file, a page will display with the details of the file. Right click on the file's name (where it shows up as a link). Click Properties. Highlight the contents of the address field (e.g. http://wiki.galenhealthcare.com/images/2/29/Example_SQL_File.sql), right click and select Copy.
Adding an image to your post
Open your Wiki post - this may be a new Wiki entry, or an update to an existing entry. Locate the area in your entry where you'd like to have the image display. Click on the Image button. It will add [[Image:Example.jpg]]. Update Example.jpg with the name of the image file that you just uploaded. That's it!
Tip
A quick and easy way to add screenshots is to click on the image button to create placeholders in your article for screenshots, give each placeholder a unique name. Then after you have finished your article and save it all of the placeholders for images will appeer in red, like a link with no info. If you click on the image placeholder it will take you to the upload dialog box and you can select your image and upload.
Adding an attachment to your post
Files other than images will simply be a link, or "attachment", from your Wiki entry. Open your Wiki post and locate the area in which you'd like the link to your file. Click on the External Link button. It will add [http://www.example.com link title]. Replace the http://www.example.com with the URL of your attachment (you copied it into your clipboard in Step 4 Uploading Files to the Wiki), and replace "link title" with the description of your attachment.