Difference between revisions of "Adding a Printer to the Allscripts Enterprise Print Server"
Jump to navigation
Jump to search
John.Buckley (talk | contribs) |
Troy.Forcier (talk | contribs) |
||
| (9 intermediate revisions by 2 users not shown) | |||
| Line 1: | Line 1: | ||
| − | == Define the Printer on the TouchWorks Print Server == | + | __TOC__ |
| + | |||
| + | == Define the Printer on the [[TouchWorks]] Print Server (Manual) == | ||
# Log on to the TouchWorks Print Server | # Log on to the TouchWorks Print Server | ||
| Line 14: | Line 16: | ||
# Choose the type of “Standard TCP/IP Port” in the drop down | # Choose the type of “Standard TCP/IP Port” in the drop down | ||
# Select [Next] | # Select [Next] | ||
| − | #: [[Image:Jdb_4.JPG] | + | #: [[Image:Jdb_4.JPG]] |
# When the above screen appears Select [Next] | # When the above screen appears Select [Next] | ||
#: [[Image:Jdb_5.JPG]] | #: [[Image:Jdb_5.JPG]] | ||
| Line 44: | Line 46: | ||
# Select [Finish] | # Select [Finish] | ||
# Repeat process for each printer that needs to be defined | # Repeat process for each printer that needs to be defined | ||
| + | |||
| + | == Define the Printer on the [[TouchWorks Print Server]] (using Print Migrator) == | ||
| + | # Visit [http://www.microsoft.com/windowsserver2003/techinfo/overview/printmigrator3.1.mspx Microsoft.com] | ||
| + | # Search for the term 'Print Migrator' -- Current version (as of 01/30/2008): 3.1 | ||
| + | # Download and save executable | ||
| + | # Run executable on source server, and select Actions >> Backup on main menu | ||
| + | # Select a destination folder and name your file. ''The application looks like it wants to Open a file, but just assume a Save-as'' | ||
| + | # Copy both the Print Migrator executable file as well as the Backup file that you just created (*.cab) to the target server. | ||
| + | # Run executable on target server, and select Actions >> Restore on main menu | ||
| + | # Select the Backup file (*.cab) and hit OK. | ||
| + | # Confirm migration success by going to Control Panel >> Printers & Fax. You should see a list of all servers from the source server on the target server. | ||
== Activating Printer in TouchWorks == | == Activating Printer in TouchWorks == | ||
| Line 49: | Line 62: | ||
# Log into TouchWorks as a user that has access to TWAdmin Workspace | # Log into TouchWorks as a user that has access to TWAdmin Workspace | ||
# Navigate to the Printing/Print Servers menu item | # Navigate to the Printing/Print Servers menu item | ||
| − | #: [[Image:Jdb_13. | + | #: [[Image:Jdb_13.JPG]] |
# Highlight the print server definition that you need to activate printers for | # Highlight the print server definition that you need to activate printers for | ||
# Select [Edit] | # Select [Edit] | ||
| − | #: [[Image:Jdb_14. | + | #: [[Image:Jdb_14.JPG]] |
# Find the newly added printer in the list | # Find the newly added printer in the list | ||
# Choose the “Active” option next to the name | # Choose the “Active” option next to the name | ||
# Select [OK] | # Select [OK] | ||
# This will activate the printer in the TouchWorks product | # This will activate the printer in the TouchWorks product | ||
| − | #: [[Image:Jdb_15. | + | #: [[Image:Jdb_15.JPG]] |
== Synching the Print Driver with the Database == | == Synching the Print Driver with the Database == | ||
# Log onto the TouchWorks Print Server | # Log onto the TouchWorks Print Server | ||
| − | # Using File Explorer navigate to the following directory: Program Files\Allscripts Healthcare Solutions\TouchWorks Web\TouchworksPrint Center | + | # Using File Explorer navigate to the following directory: C:\Program Files\Allscripts Healthcare Solutions\TouchWorks Web\TouchworksPrint Center |
# Find the following executable: CSSPrinterTrays.exe | # Find the following executable: CSSPrinterTrays.exe | ||
# Double-click the executable | # Double-click the executable | ||
| − | #: [[Image:Jdb_16. | + | #: [[Image:Jdb_16.JPG]] |
# Enter your Web Server name and select SSL if using that option | # Enter your Web Server name and select SSL if using that option | ||
# Ensure that the AppGroup is set to “TouchWorks” | # Ensure that the AppGroup is set to “TouchWorks” | ||
# Select [Connect] | # Select [Connect] | ||
| − | #: [[Image:Jdb_17. | + | #: [[Image:Jdb_17.JPG]] |
# The Print Servers List should populate | # The Print Servers List should populate | ||
# Highlight the Print Server that you would like modify | # Highlight the Print Server that you would like modify | ||
# Select [Edit] | # Select [Edit] | ||
| − | #: [[Image:Jdb_18. | + | #: [[Image:Jdb_18.JPG]] |
# Navigate to the printer that you would like to synch to the database | # Navigate to the printer that you would like to synch to the database | ||
# Highlight the printer | # Highlight the printer | ||
| − | #: [[Image:Jdb_19. | + | #: [[Image:Jdb_19.JPG]] |
# When highlighted, the product should show the tray information reported from the driver on the right hand side. If the information displayed in the database is missing or different Select [Synch] | # When highlighted, the product should show the tray information reported from the driver on the right hand side. If the information displayed in the database is missing or different Select [Synch] | ||
| − | #: [[Image:Jdb_20. | + | #: [[Image:Jdb_20.JPG]] |
# When done, both sides should report the same information | # When done, both sides should report the same information | ||
# Repeat this process for each printer you are installing | # Repeat this process for each printer you are installing | ||
# Select [Close] | # Select [Close] | ||
# Select [Cancel] to close out of the application | # Select [Cancel] to close out of the application | ||
Latest revision as of 15:12, 15 May 2012
Define the Printer on the TouchWorks Print Server (Manual)
- Log on to the TouchWorks Print Server
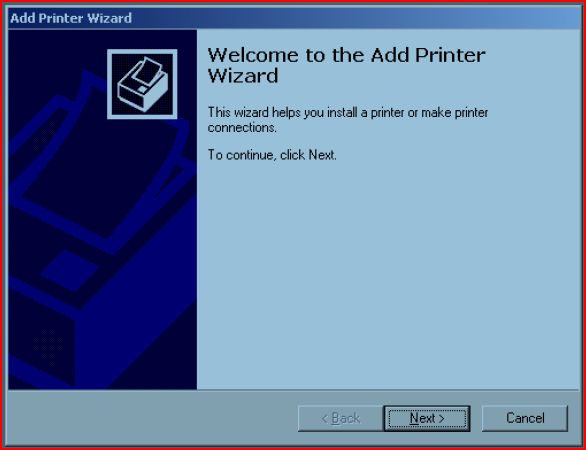
- Select Start/Printers and Faxes
- Select “Add a Printer”
- Select [Next]
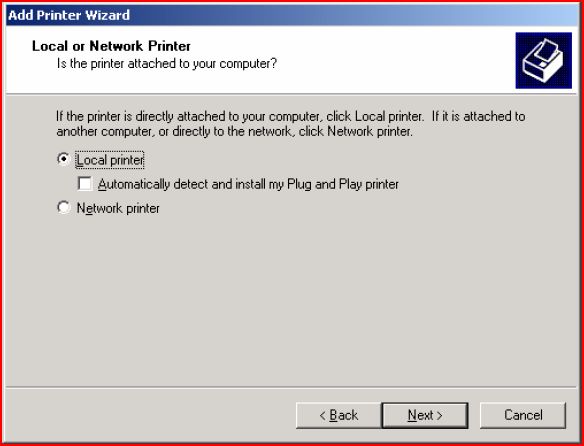
- Select “Local printer”
- Uncheck the Plug and Play option if it is checked
- Select [Next]
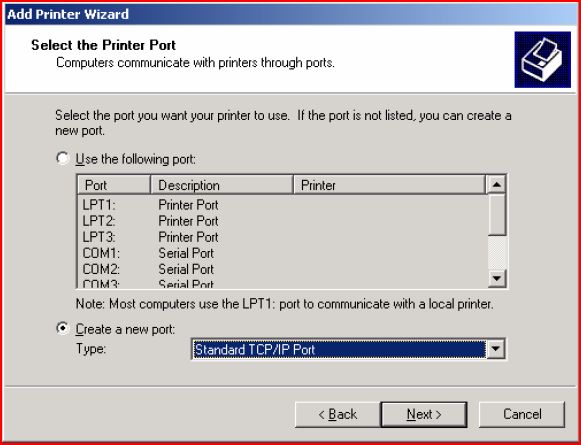
- Select Create a new port
- Choose the type of “Standard TCP/IP Port” in the drop down
- Select [Next]
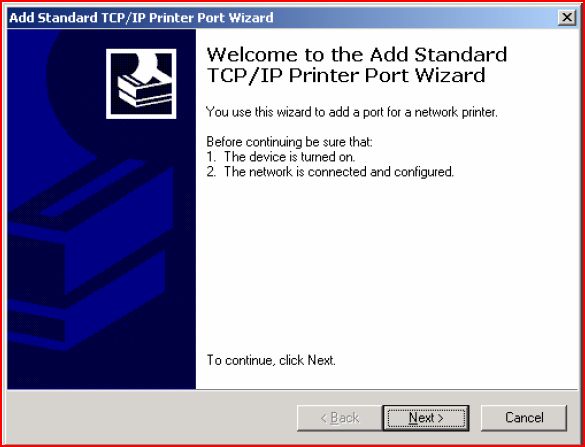
- When the above screen appears Select [Next]
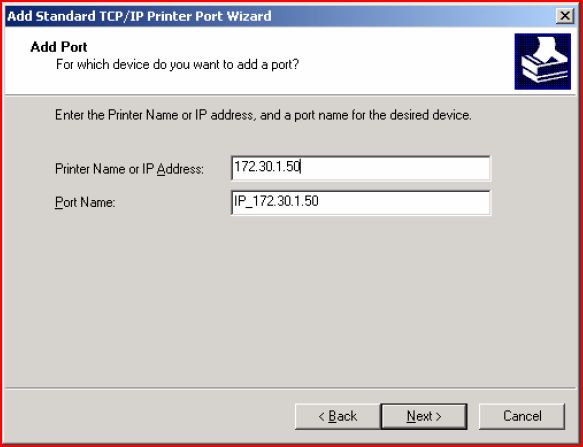
- Enter the IP address (The Port Name will automatically be filled out)
- Select [Next]
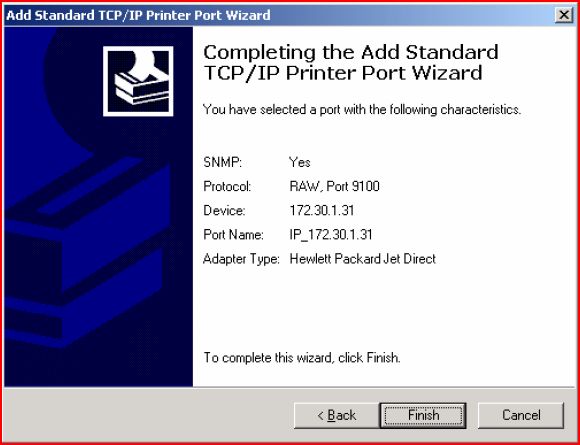
- When the screen above appears, Select [Finish]
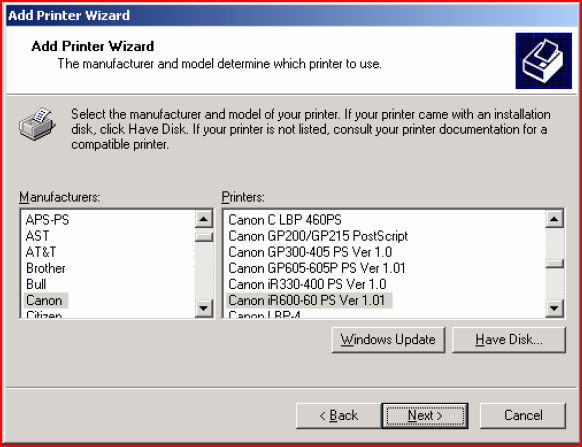
- When the above screen appears, select the proper printer from the list. If it is not there, you may need to install the print driver on the server and the select the “Have Disk” option to load the driver.
- Once the appropriate printer is highlighted Select [Next]
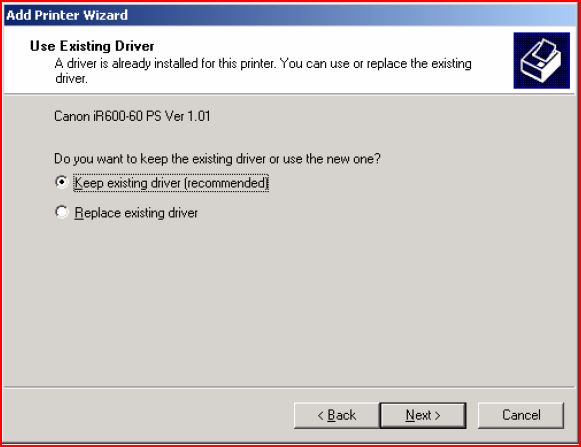
- Choose “Keep the existing driver”, unless you have a reason not to
- Select [Next]
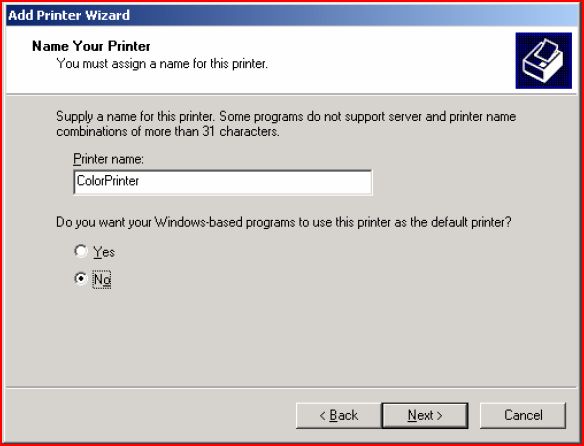
- Enter a descriptive printer name (This will be the name that appears in TouchWorks)
- Choose “No” for the use as default option, unless that is necessary
- Select [Next]
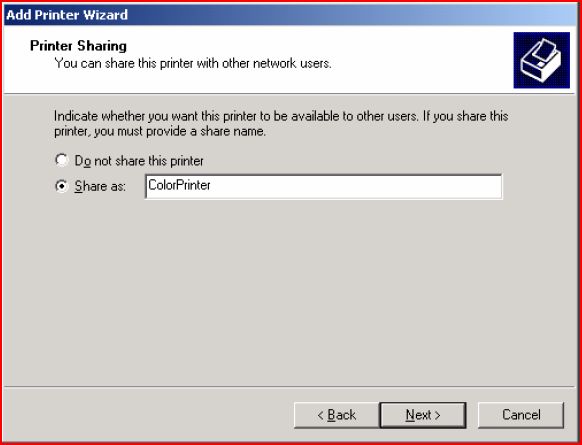
- Select the “Share as:” option
- Enter the exact same name as you entered on the previous screen
- Select [Next]
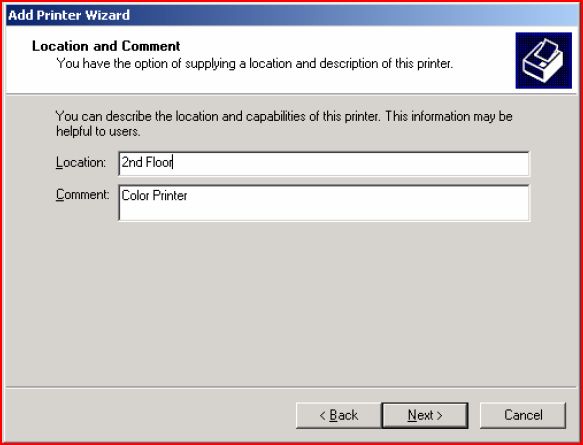
- Enter a descriptive location and comment
- Select [Next]
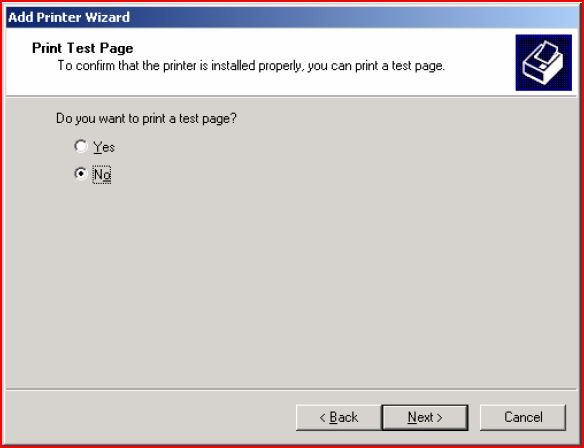
- Choose [No]
- Select [Next]
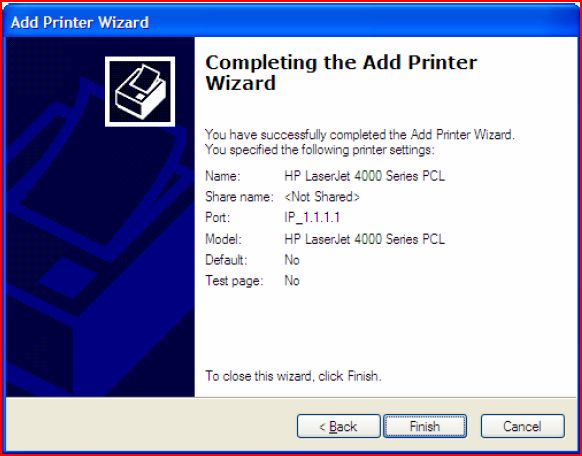
- Select [Finish]
- Repeat process for each printer that needs to be defined
Define the Printer on the TouchWorks Print Server (using Print Migrator)
- Visit Microsoft.com
- Search for the term 'Print Migrator' -- Current version (as of 01/30/2008): 3.1
- Download and save executable
- Run executable on source server, and select Actions >> Backup on main menu
- Select a destination folder and name your file. The application looks like it wants to Open a file, but just assume a Save-as
- Copy both the Print Migrator executable file as well as the Backup file that you just created (*.cab) to the target server.
- Run executable on target server, and select Actions >> Restore on main menu
- Select the Backup file (*.cab) and hit OK.
- Confirm migration success by going to Control Panel >> Printers & Fax. You should see a list of all servers from the source server on the target server.
Activating Printer in TouchWorks
- Log into TouchWorks as a user that has access to TWAdmin Workspace
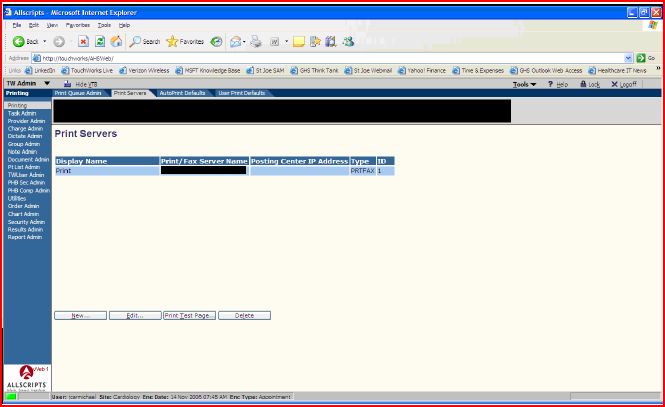
- Navigate to the Printing/Print Servers menu item
- Highlight the print server definition that you need to activate printers for
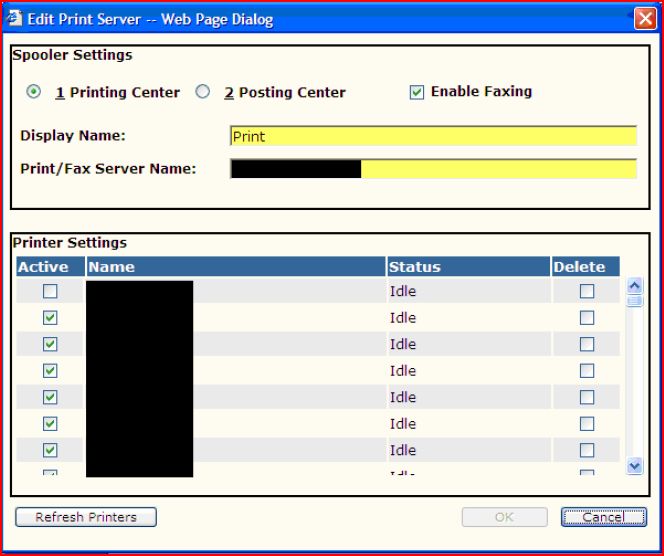
- Select [Edit]
- Find the newly added printer in the list
- Choose the “Active” option next to the name
- Select [OK]
- This will activate the printer in the TouchWorks product
Synching the Print Driver with the Database
- Log onto the TouchWorks Print Server
- Using File Explorer navigate to the following directory: C:\Program Files\Allscripts Healthcare Solutions\TouchWorks Web\TouchworksPrint Center
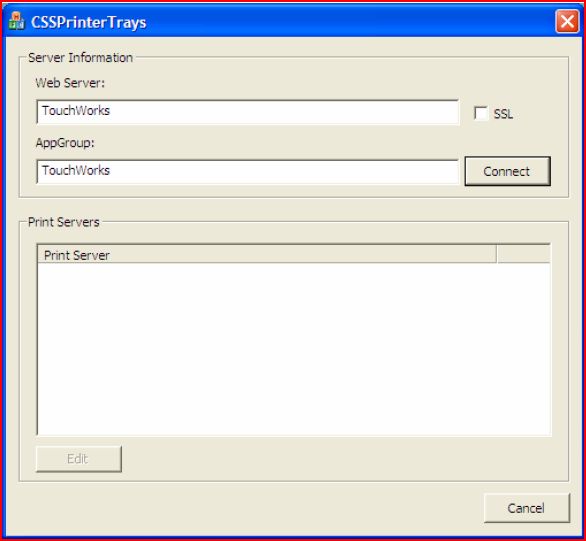
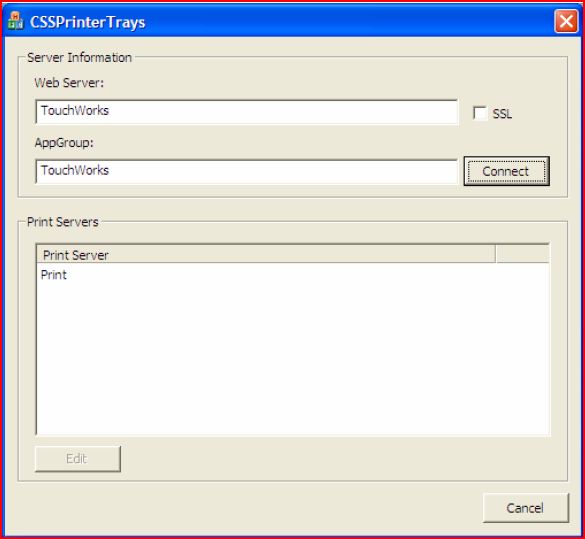
- Find the following executable: CSSPrinterTrays.exe
- Double-click the executable
- Enter your Web Server name and select SSL if using that option
- Ensure that the AppGroup is set to “TouchWorks”
- Select [Connect]
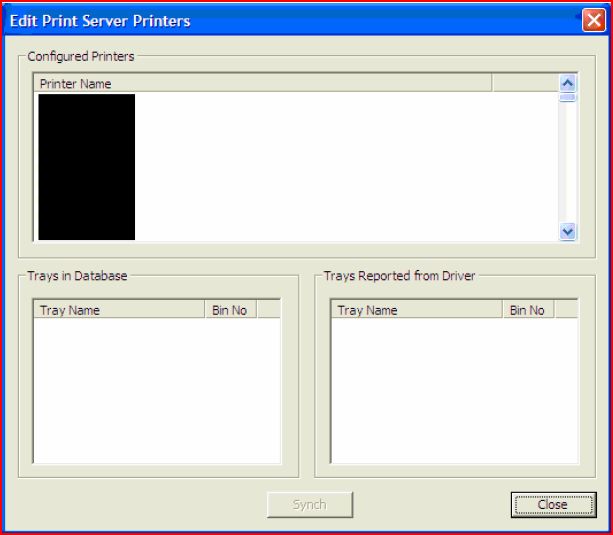
- The Print Servers List should populate
- Highlight the Print Server that you would like modify
- Select [Edit]
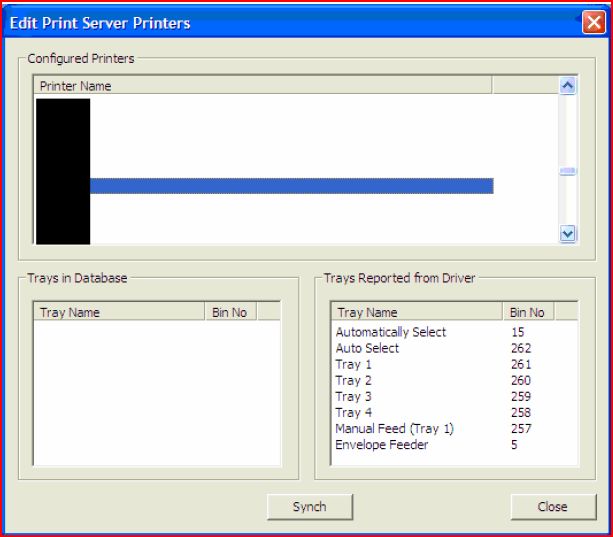
- Navigate to the printer that you would like to synch to the database
- Highlight the printer
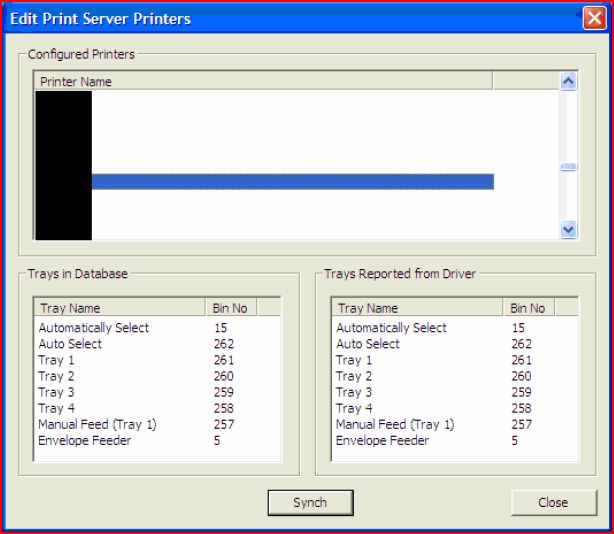
- When highlighted, the product should show the tray information reported from the driver on the right hand side. If the information displayed in the database is missing or different Select [Synch]
- When done, both sides should report the same information
- Repeat this process for each printer you are installing
- Select [Close]
- Select [Cancel] to close out of the application
