Allscripts Enterprise V11 Vitals View Setup
Revision as of 00:01, 21 November 2010 by John.Buckley (talk | contribs)
This is a brief explanation of how to create and publish to the end user vitals view within Allscripts Enterprise EHR v11.
File:TouchWorks v11 Vitals View.doc
Allscripts Enterprise EHR v11 Vitals View Setup:
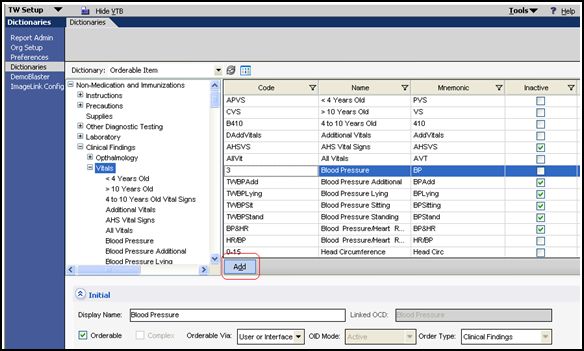
- Create an Orderable Item (OI) for each vital sign you want to capture. Create them in the orderable item dictionary (OID) under Non-Medication and Immunizations -> Clinical Findings ->Vitals (some items come enforced with the OID, so make sure to search for your item prior to adding a new item to eliminate creating duplicates)
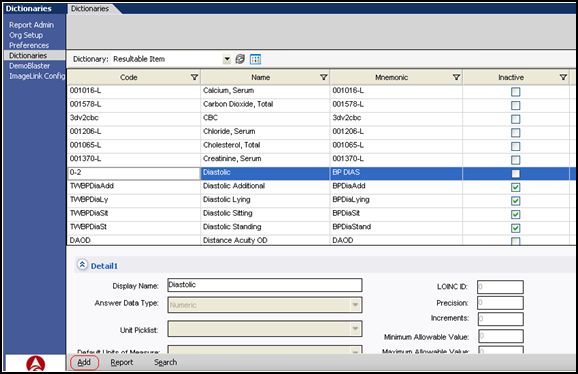
- Create a Resultable Item (RI) in your resultable item dictionary (RID) for each OID that you want to capture (make sure for items such as blood pressure systolic and diastolic are broken out into two resultable items)
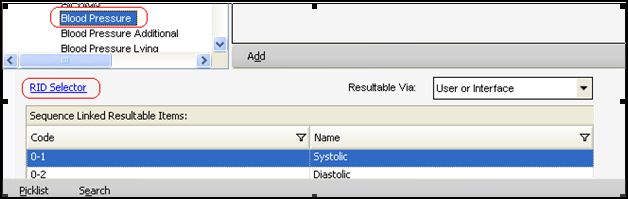
- Tie a resultable item (s) to the corresponding Orderable item within the OI by selecting “RID Selector” and searching for and adding the appropriate corresponding results (some OI’s will have more than one RI such as OI – Blood Pressure will have 2 – systolic and diastolic resultable items)
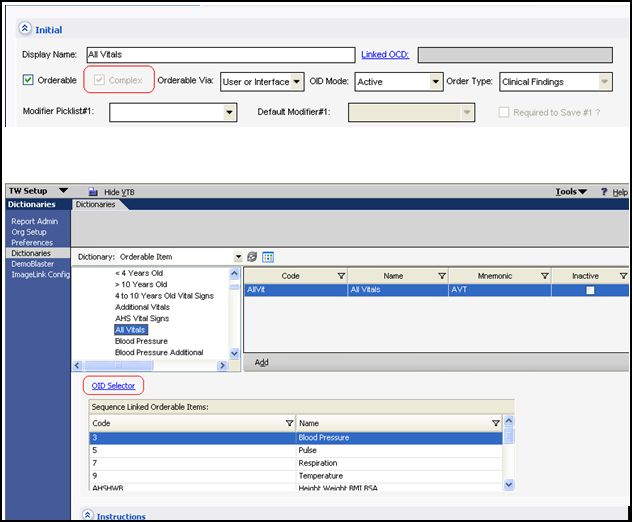
- You will need to create an orderable item that contains all of the vitals you would like to capture (example: All Vitals). You accomplish this by selecting the “Complex” checkbox within this All Vitals orderable item. This will allow you to associate multiple orderable items with this vitals orderable item, so you could add blood pressure, pulse, respiration, etc. via the OID Selector.
- Next, within your OID you will select “Picklist” from the bottom left to assign your All Vitals orderable item to a picklist. One picklist comes standard with the application (TW Vitals Picklist), but you can create your own vitals picklist by clicking “Add Picklist” in the Orderable Item Picklist window. Select the existing Picklist or the Picklist you just created (ex: Vitals Picklist) and hit “Add Entry” to add your All Vitals orderable item to the picklist. (this will make the All Vitals orderable item available to the end user as a vitals view)

- You can assign the vitals picklist at the enterprise level or at the user level within TWSetup – Preferences which will allow the enterprise/user to see this picklist in their vitals dropdown menu.
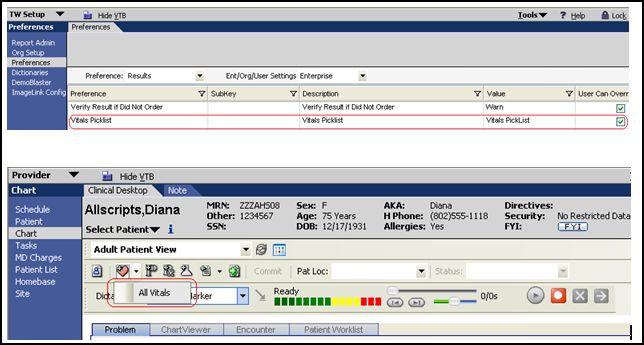
- You can add multiple vitals groupings to the picklist like “All Vitals”, which would give you multiple choices in the vitals dropdown menu.


