Difference between revisions of "Build Flowsheets"
| Line 45: | Line 45: | ||
[[Image:View_Flowsheet.jpg]] | [[Image:View_Flowsheet.jpg]] | ||
| − | ==Build a new Flowsheet== | + | ==Build a new Flowsheet == |
| − | + | #Select the Specialty to which the new Flowsheet will belong. | |
| − | + | # Click the New button. | |
| − | + | # Enter the Name of the new Flowsheet. | |
| − | + | # Link the Flowsheet to a problem or problems if necessary. | |
| − | + | # To add an orderable item, click Add Item. | |
| − | + | # Select a Classification to browse or use the Search field. | |
| − | + | # To add a Medcin Finding, click Add Findings. | |
| − | + | # Select a Classification of findings or use the Search field. | |
| − | + | # When finished adding the desired items, Preview the Flowsheet. | |
| − | + | # Once you are satisfied with the Flowsheet, click Save or: | |
| − | Select a | + | # If you are not sure you are completely satisfied, click Save as Draft. This will allow you |
| − | + | to complete the Flowsheet later. | |
| − | |||
| − | |||
| − | Select a | ||
| − | |||
When finished adding the appropriate items to the Flowsheet, click OK and view the items under the Build tab on the main screen | When finished adding the appropriate items to the Flowsheet, click OK and view the items under the Build tab on the main screen | ||
| − | |||
| − | |||
| − | |||
| − | |||
| − | |||
| − | |||
| − | |||
[[Image:draft flowsheet.jpg]] | [[Image:draft flowsheet.jpg]] | ||
Revision as of 18:00, 8 May 2008
Rows from Upgrade Build Workbook_Phase 1.xls:
Define Result items that should be considered equivalent when included in a flowsheet.
Review flowsheets that contain Medcin Findings and build corresponding clinical forms.
Flowsheet Overview
Flowsheets serve as a convenient tool for looking at patient data over time and analyzing trends
- Columns – represent an interval of time (i.e. week)
- Rows – represent selected clinical data (i.e. results)
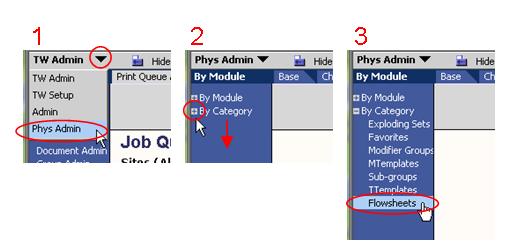
Access Flowsheet Builder
Login to TouchWorks using a TW Administrative account (TWAdmin)
- Change the workplace from TWAdmin to Phys Admin
- Expand the By Category menu item in the VTB
- Select Flowsheets
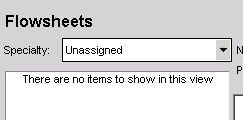
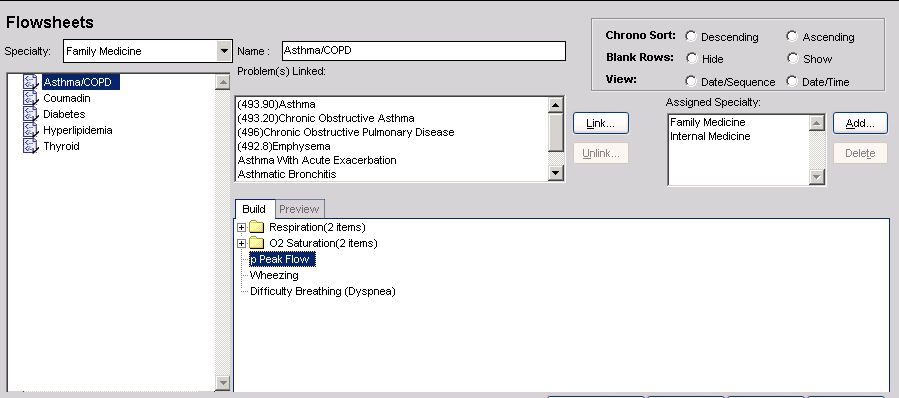
Flowsheets are organized by Specialty
The default category in the Specialty dropdown is 'Unassigned'
'Unassigned' displays any flowsheets not assigned to a specialty
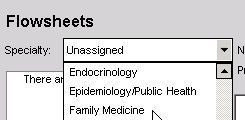
Select 'Family Medicine' from the Specialty dropdown
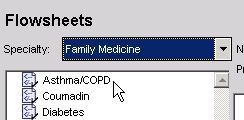
The list of flowsheets linked to 'Family Medicine' appears
Select 'Asthma'
The 'Asthma' flowsheet is displayed
Build a new Flowsheet
- Select the Specialty to which the new Flowsheet will belong.
- Click the New button.
- Enter the Name of the new Flowsheet.
- Link the Flowsheet to a problem or problems if necessary.
- To add an orderable item, click Add Item.
- Select a Classification to browse or use the Search field.
- To add a Medcin Finding, click Add Findings.
- Select a Classification of findings or use the Search field.
- When finished adding the desired items, Preview the Flowsheet.
- Once you are satisfied with the Flowsheet, click Save or:
- If you are not sure you are completely satisfied, click Save as Draft. This will allow you
to complete the Flowsheet later.
When finished adding the appropriate items to the Flowsheet, click OK and view the items under the Build tab on the main screen
View Flowsheet in user interface
- Navigate to the Clinical Desktop
- Select HMP
- Change the View to Flowsheets
- Select Proper Specialty
- Select Desired Flowsheet

