Difference between revisions of "Creating a picklist for Requested Performing Location"
Jump to navigation
Jump to search
Jerri.cowper (talk | contribs) |
|||
| (One intermediate revision by one other user not shown) | |||
| Line 11: | Line 11: | ||
[[Image:ReqPerfLocDictionary.JPG]] | [[Image:ReqPerfLocDictionary.JPG]] | ||
| − | # Select the Picklist button on the bottom of the screen. | + | # Select the Picklist button on the bottom of the screen. The following screen will appear: |
[[Image:ReqPerfLocPicklist.JPG]] | [[Image:ReqPerfLocPicklist.JPG]] | ||
| Line 33: | Line 33: | ||
# When you have the valid entries on the right, press "OK". This will bring you back to the original screen. | # When you have the valid entries on the right, press "OK". This will bring you back to the original screen. | ||
# When you are done adding each of your picklists, press "Close" | # When you are done adding each of your picklists, press "Close" | ||
| + | |||
| + | Return to [[V10 to V11.2 Build Workbook (BW)]] | ||
Latest revision as of 23:38, 14 March 2011
Description
This article describes how to create a picklist for the Requested Performing Location dictionary. This is used to define the appropriate values that users can select. This is used with the SSMT: OID - Order Defaults - Insurance/PatientLocation/Site spreadsheet to define the appropriate values for the order details screen.
Detailed Steps
- Log into TouchWorks as a user that has access to TWAdmin.
- Go to the Dictionaries VTB.
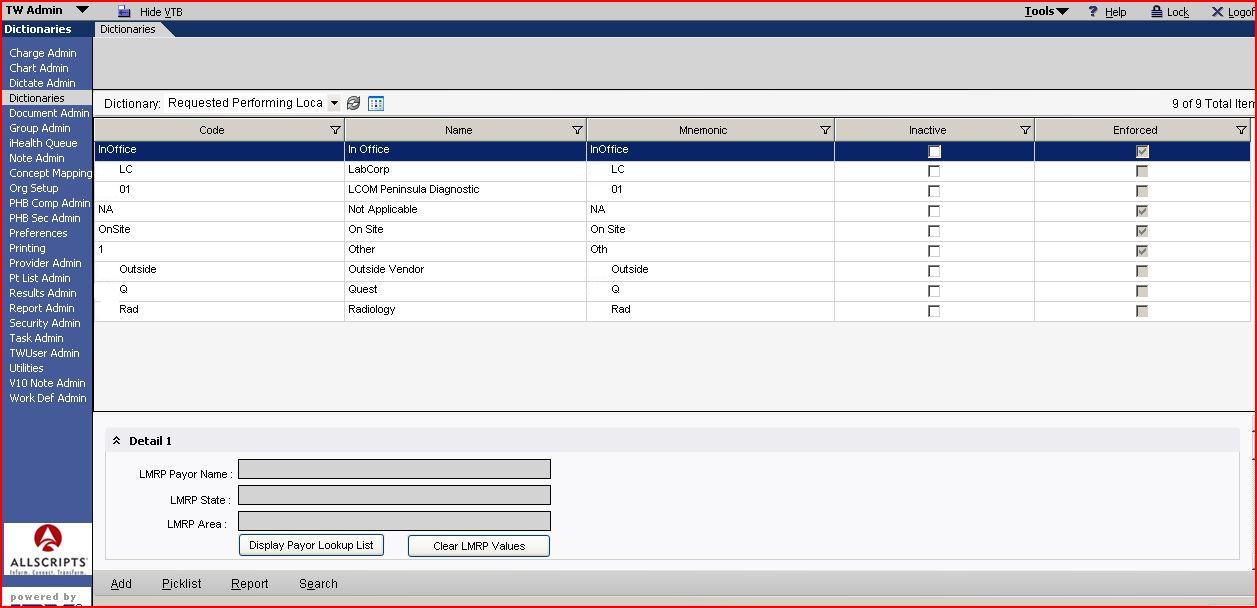
- Select the Requested Performing Location dictionary from the drop down list.
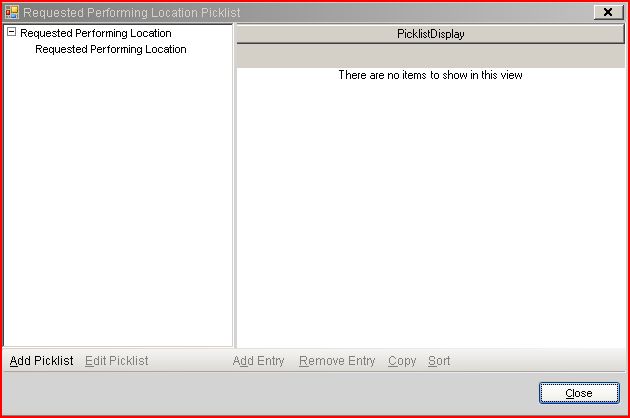
- Select the Picklist button on the bottom of the screen. The following screen will appear:
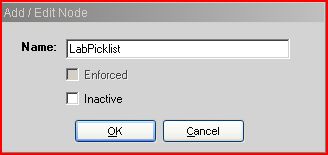
- Select the "Add Picklist" button at the bottom of this screen. This will bring up the following screen:
- Enter the desired name of the Picklist.
- Press "OK"
- Highlight the newly added entry on the left. This will activate the "Add Entry" button.
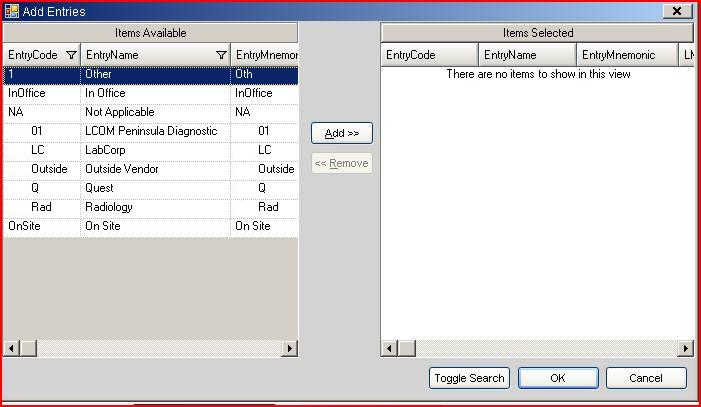
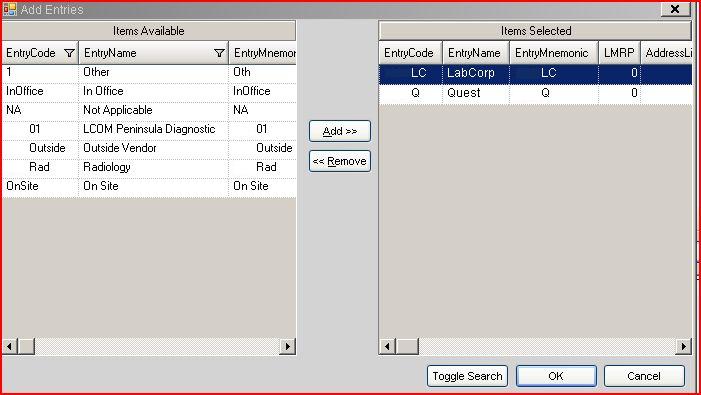
- Select "Add Entry". It opens the following screen.
- Within this area, you would select one of the desired entries for the picklist and select "Add>>".
- Repeat this step for each entry that you'd like in your picklist.
- When you have the valid entries on the right, press "OK". This will bring you back to the original screen.
- When you are done adding each of your picklists, press "Close"
Return to V10 to V11.2 Build Workbook (BW)
