Difference between revisions of "Custom Print Forms"
(New page: == Overview == Custom Print Forms, or printouts, are forms made available when printing from the Allscripts Enterprise EHR. These are generated in Crystal Reports (Crystal 10 for AE EHR v...) |
|||
| Line 14: | Line 14: | ||
[[Image:Print Dialog - Default.jpg]] | [[Image:Print Dialog - Default.jpg]] | ||
<br><br> | <br><br> | ||
| − | You can also edit these settings under User Print Defaults | + | You can also edit these settings under Queue Admin > User Print Defaults |
<br> | <br> | ||
| − | + | ||
<br><br> | <br><br> | ||
Simply select the area of printing that you’d like to change and click Details: | Simply select the area of printing that you’d like to change and click Details: | ||
Revision as of 12:28, 12 August 2014
Overview
Custom Print Forms, or printouts, are forms made available when printing from the Allscripts Enterprise EHR. These are generated in Crystal Reports (Crystal 10 for AE EHR v10 and v11).
Default Print Form
When a new Print Form is added, users will now have multiple forms to select from. Users do have the option of designating one form as the default. If no default is selected, the first Print Form, alphabetically, becomes the automatic "default".
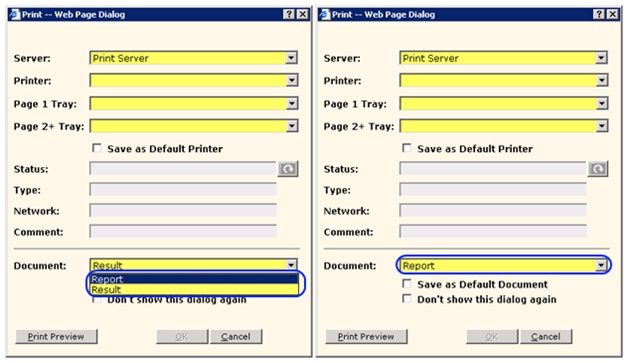
Let’s use an example where a new Print Form for Results is added to the system. When you are in ChartViewer and print a result, you would now have two options. Let’s assume that new Print Form is one for radiology reports, called Report. When you go to print, you would have the two options below (left). If the user you’re logged in as hasn’t selected a default Document (aka Print Form), the Print Form that comes first alphabetically will be the default (below, right).

If you would like to assign a default Print Form / Document, you may so in a couple different areas – when printing, or under User Print Defaults.
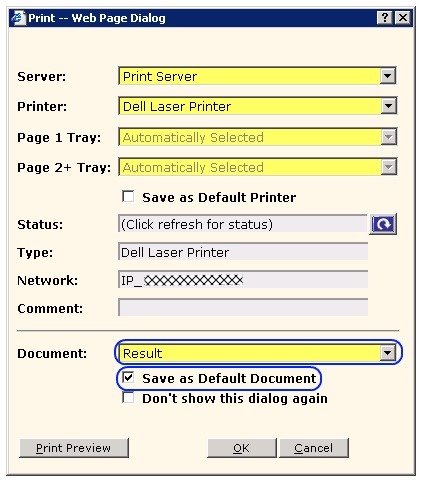
When printing, simply select the Print Form that you would like as your default (Result in the example below) and click OK. Each time going forward, that Print Form will be your default, rather than the first Print Form alphabetically.

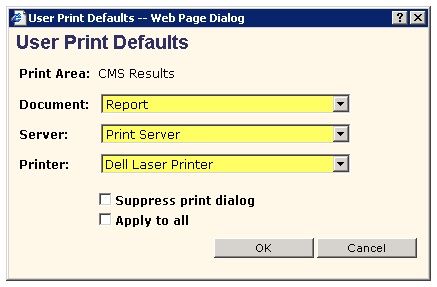
You can also edit these settings under Queue Admin > User Print Defaults
Simply select the area of printing that you’d like to change and click Details:
