Difference between revisions of "IEX Installation, Configuration, Troubleshooting"
(Created page with '==Setting Up Automatic Importing in ImpactMD== ImpactMD (aka TW Scan) has an automatic import utility which is called the IEX (Import/Export). This is a Windows service that wil…') |
John.Buckley (talk | contribs) |
||
| (2 intermediate revisions by 2 users not shown) | |||
| Line 1: | Line 1: | ||
| + | [[Category:Allscripts Document Management]] | ||
==Setting Up Automatic Importing in ImpactMD== | ==Setting Up Automatic Importing in ImpactMD== | ||
| Line 76: | Line 77: | ||
===Naming a Document for Importing=== | ===Naming a Document for Importing=== | ||
| − | + | When Naming the Documents for Import, It is recommended to use an Underscore instead of a space. This also needs to be reflected in the import template in Scan. (EX: 3_80000_82_Labs_19950306.pdf vs 3 80000 82 Labs 19950306.pdf) Another requirement is for multiple Organization Databases. It is important to lead with the TW OrgID then the Patient Identifiers Then the Folder Number. By naming the documents in this order, it prevents errors due to type mismatch. Listed Below is the definitions of the fields that can be used in the name of the document. | |
| + | |||
| + | '''Account#''' | ||
| + | (PM Account Number, if interfaced and stored) | ||
| + | |||
| + | '''AutoTask#''' | ||
| + | (Unknown) | ||
| + | |||
| + | '''Chart#''' | ||
| + | EHR Organization MRN value (is Org specific in a multi-org environment and found in demographics or dbo.Works.Patient_IOrg.OrganizationMRN) | ||
| + | |||
| + | '''DocumentDate''' | ||
| + | This is the date assigned to the imported document – typically this is driven and assigned by the sources system, but in either case regardless of where it is defined (outbound/inbound) it must confirm to at least one of the input masks for valid Date/Time formats. | ||
| + | |||
| + | '''DocumentName''' | ||
| + | When creating a custom template, the document name is a required field in the IEX import configuration itself – it does not HAVE to be assigned as part of the file name convention, but does need to be defined in the IEX setup/tool itself for that particular import routine; this value is helpful when looking at documents in Scan (is free text). | ||
| + | Enc. | ||
| + | |||
| + | '''Account#''' | ||
| + | (Unknown) | ||
| + | |||
| + | '''Folder#''' The FolderID of the Scan target folder (can be found by running the Print Import Reference Report in Scan; go to Configure >System Setup > Chart Setup, single on the Chart Group to grab Folder ID’s for and select File >Print Import Reference Report) – resides in the Impact database. | ||
| + | |||
| + | '''SSN''' | ||
| + | Social Security Number for the patient (found in demographics or dbo.Works.Person.SSN) | ||
| + | |||
| + | '''Task Recipient#''' | ||
| + | (Unknown) | ||
| + | |||
| + | '''Organization''' | ||
| + | (Unknown) | ||
| + | |||
| + | '''TW OrgID''' | ||
| + | This is the internal database ID of the targeted EHR Org (applies in a multi-org environment for patient patching – can be found in dbo.Works.Organization.ID) | ||
| + | |||
| + | '''TW Document OwnerID''' | ||
| + | This is the database ID of the target owner of the document in EHR (target owner must exist as user/provider to exist in framework – can also be pulled from dbo.Works.Provider.ID) | ||
===IEX Support=== | ===IEX Support=== | ||
If you need further assistance with setup or troubleshooting errors with the IEX, please call our Allscripts Support Help Desk at 888-426-7226, option 3. | If you need further assistance with setup or troubleshooting errors with the IEX, please call our Allscripts Support Help Desk at 888-426-7226, option 3. | ||
| + | |||
| + | ==More information== | ||
| + | You may find more information in the [[Media:IEX Install-Configure.pdf|IEX Install-Configure Guide]]. | ||
Latest revision as of 14:55, 26 November 2012
Setting Up Automatic Importing in ImpactMD
ImpactMD (aka TW Scan) has an automatic import utility which is called the IEX (Import/Export). This is a Windows service that will monitor a shared folder on the network and import documents into the chart using a pre-specified template. The first step is to ensure that the IEX service is properly installed on the server.
Installing IEX
ImpactMD v3.31
- If the IEX has not been installed as a Windows service:
- 1. Click START>>RUN
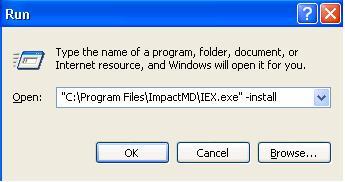
- 2. Browse to the root folder of ImpactMD on the server. Select the IEX.exe. Insert a “-install” at the end of the path.
The path should be similar to this:
- 3. Click OK.
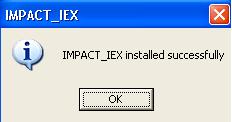
You should get the following message:
Configuring IEX
Add IEX service in Service Manager
Go to the root folder of ImpactMD and double click “AIC_ISM”.
Note: This is a different ".exe" file from what is found in prior versions of ImpactMD.
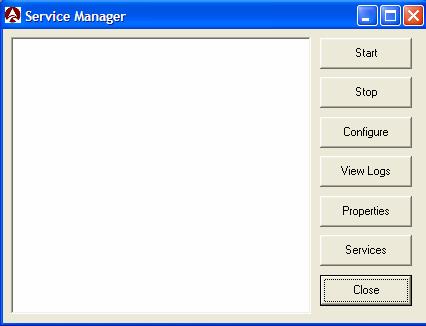
You will now see the screen below.
- Click the “Services” button.
- Click “Find”.
- Find the Impact_IEX from the list and click “Select”.
- Click “Add” on the next screen.
- The IEX service now appears in the Service Manager (AIC_ISM).
Import Configuration
- Click “Configure” to setup the IEX.
- Make sure that “Enable Demographic Export” & “Enable Schedule Export” are unchecked.
- Put a check mark in “Enable DID Document Import”. Putting a check mark here enables the document import function.
- Click “Add”.
- Select the “Import Path” for the documents to be imported. This should be a shared folder on the network. Normally this is a “UNC” path. Put in a “Document Name”. This document name will be ignored if the Import Template you are using will specify a name for the document (but you are required to input a name here no matter).
- Now click the ellipses button on “Import Template”.
- Select the Import Template you will use for this import routine. We will cover creating custom templates later in this document. Click “OK”
- You will need to indicate the file type if you would like IEX to pull in only a certain file type from a folder, i.e. You have a wav file and a Word document coming in from your transcriptionists, if you indicate .doc as your file type, only those documents will be imported.
- You may select “Send documents which do not match template to the Batch Basket”. This option will send any document that is imported and does not match the specified template format to the Batch Basket. That document can then later be sorted to the correct chart. #Click “Save”
You will now see your new import routine setup in the window. You may add as many import routines as you wish. Each one would need to be pointed to a different folder on the network (import path).
You have the option of selecting “Log Detail”. This will create a detailed import log for troubleshooting.
The default Interval (in seconds) is set to ‘60’. This means that every 60 seconds, the IEX will look inside the specified folders to see if there is any information to import. The default 60 seconds is the highest number you go set…but you may change this number to a lower setting (30 – 60 seconds is the norm). Click “OK” when done. Unlike in previous versions of ImpactMD, you may “Start” & “Stop” the IEX Service from this screen. Click “Close” when done. NOTE: As stated earlier in the instructions, the Windows Service will need to be set to run as an administrator account.
Creating a Custom Template
Many times, you will need to create a custom template for importing documents with the IEX. The steps below will outline the procedure for creating a custom template. The IEX will import documents based upon certain criteria held within the name of a document. Normal criteria used for importing includes:
- Chart (MRN) number – This is the number associated with the patient in the system
- Folder number - This is a number that is associated with the actual folder in ImpactMD. By assigning the folder #, the IEX will import the document directly into the patient chart and into the correct folder in the chart structure.
- Date of document – You can associate a document date with the imported document.
- Name of document – When creating a custom template, the document name is a required field. This name will be carried over into the chart for the particular document.
To create a custom template, open ImpactMD and click "CONFIGURE > SYSTEM SETUP > IMPORT TEMPLATE SETUP" Note: There are already several templates pre-made in the system. You may opt to use one of these templates or create a custom template. For this exercise, we will create a custom template using the Chart #, Folder #, & Document name.
- Click “Add”.
- Select a name for your template. Choose “Patient Chart” for the “Template Table”. Choose “Document File” for the “Template Type”. My template will be named “Import Test”.
- Now we must select the criteria used for importing. The first Data Type we will choose is “Chart #”. Select this from the drop down list.
- Now choose what delimiter we will use for our files. For this instance, we will choose “Underscore”.
- Next, we will choose “Folder #” for our next Data Type. (We will discuss how to find a particular Folder # later in this document). Choose Underscore as your Delimiter once again.
- Choose “Document Name” as the last Data Item. Select “Last Field” for the Delimiter. We are choosing “Last Field” for the last item in our template. This tells the IEX to ignore any data beyond the “Document Name”.
- Click “Save”.
You can now see “Import Test” as one of the list items on the Document Import Template screen. This template is now ready for selection in the configuration screen of IEX.
Naming a Document for Importing
When Naming the Documents for Import, It is recommended to use an Underscore instead of a space. This also needs to be reflected in the import template in Scan. (EX: 3_80000_82_Labs_19950306.pdf vs 3 80000 82 Labs 19950306.pdf) Another requirement is for multiple Organization Databases. It is important to lead with the TW OrgID then the Patient Identifiers Then the Folder Number. By naming the documents in this order, it prevents errors due to type mismatch. Listed Below is the definitions of the fields that can be used in the name of the document.
Account# (PM Account Number, if interfaced and stored)
AutoTask# (Unknown)
Chart# EHR Organization MRN value (is Org specific in a multi-org environment and found in demographics or dbo.Works.Patient_IOrg.OrganizationMRN)
DocumentDate This is the date assigned to the imported document – typically this is driven and assigned by the sources system, but in either case regardless of where it is defined (outbound/inbound) it must confirm to at least one of the input masks for valid Date/Time formats.
DocumentName When creating a custom template, the document name is a required field in the IEX import configuration itself – it does not HAVE to be assigned as part of the file name convention, but does need to be defined in the IEX setup/tool itself for that particular import routine; this value is helpful when looking at documents in Scan (is free text). Enc.
Account# (Unknown)
Folder# The FolderID of the Scan target folder (can be found by running the Print Import Reference Report in Scan; go to Configure >System Setup > Chart Setup, single on the Chart Group to grab Folder ID’s for and select File >Print Import Reference Report) – resides in the Impact database.
SSN Social Security Number for the patient (found in demographics or dbo.Works.Person.SSN)
Task Recipient# (Unknown)
Organization (Unknown)
TW OrgID This is the internal database ID of the targeted EHR Org (applies in a multi-org environment for patient patching – can be found in dbo.Works.Organization.ID)
TW Document OwnerID This is the database ID of the target owner of the document in EHR (target owner must exist as user/provider to exist in framework – can also be pulled from dbo.Works.Provider.ID)
IEX Support
If you need further assistance with setup or troubleshooting errors with the IEX, please call our Allscripts Support Help Desk at 888-426-7226, option 3.
More information
You may find more information in the IEX Install-Configure Guide.


