Difference between revisions of "OID OCD syncing and Mapping"
Max.Stroud (talk | contribs) |
|||
| (20 intermediate revisions by 7 users not shown) | |||
| Line 1: | Line 1: | ||
__TOC__ | __TOC__ | ||
| + | ==Version Information== | ||
| + | *[[Article Creation|Article Created based on version]]: 11.1.4 HF #4 | ||
| + | *[[Article Last Update|Last Updated with version]]: | ||
==Description== | ==Description== | ||
This article describes the OID Synchronization and OCD mapping steps for a v10 to v11 upgrade client. A new v11 client install should refer to the [[V11 Order and Result Dictionary Build and Synchronization]] Article. | This article describes the OID Synchronization and OCD mapping steps for a v10 to v11 upgrade client. A new v11 client install should refer to the [[V11 Order and Result Dictionary Build and Synchronization]] Article. | ||
| Line 6: | Line 9: | ||
* Orderable Concepts are the generic standard names for all orderable items within the TouchWorks system and are defined and delivered by Allscripts. | * Orderable Concepts are the generic standard names for all orderable items within the TouchWorks system and are defined and delivered by Allscripts. | ||
* Orderable Items are the items that your organization has loaded based on the varying vendors used for Results interfaces. | * Orderable Items are the items that your organization has loaded based on the varying vendors used for Results interfaces. | ||
| − | * A professional familiar with the individual OID items needs to do the mapping, this is typically a person with lab experience. | + | * A professional familiar with the individual OID items needs to do the mapping, this is typically a person with lab experience. |
| + | |||
| + | For complex issues related to this process see [[Advanced Order Set-Up]] | ||
The following steps must be completed in order: | The following steps must be completed in order: | ||
| Line 28: | Line 33: | ||
* For more information regarding the use of [[SSMT]] please refer to the [[SSMT]] page. | * For more information regarding the use of [[SSMT]] please refer to the [[SSMT]] page. | ||
| − | * For more information regarding the Performing Location Content Category, please refer to the [[SSMT: Performing Location]] article. | + | * For more information regarding the Performing Location Content Category, please refer to the [[SSMT: Performing Location]] article. |
==Populate [[Orderable Item]] Dictionary (OID)== | ==Populate [[Orderable Item]] Dictionary (OID)== | ||
| Line 39: | Line 44: | ||
* If you are missing the CPT4 codes, you would attempt to populate those for the primary vendor during this step. This is easiest using the [[SSMT]] tool. The CPT4 codes will assist with the mapping to the OCD dictionary, but it is not going to map all items. The success of this varies from client to client, but in most cases it'll assist with about 20% of the mapped values. | * If you are missing the CPT4 codes, you would attempt to populate those for the primary vendor during this step. This is easiest using the [[SSMT]] tool. The CPT4 codes will assist with the mapping to the OCD dictionary, but it is not going to map all items. The success of this varies from client to client, but in most cases it'll assist with about 20% of the mapped values. | ||
| − | * Once you have the CPT4 codes, use [[SSMT]] to populate the codes in the system if this hasn't previously been done. This can be done using the content category of 'OID - Orderable Item Dictionary'. If you are only adding CPT4 codes, you would extract the appropriate OID items from SSMT and populate the CPT4 column. Once that has been populated in the excel spreadsheet, you would load the items into [[SSMT]] to update the dictionary. This would complete this step. | + | * Once you have the CPT4 codes, use [[SSMT]] to populate the codes in the system if this hasn't previously been done. This can be done using the content category of 'OID - Orderable Item Dictionary' and will be around the AA column (depending on version). If you are only adding CPT4 codes, you would extract the appropriate OID items from SSMT and populate the CPT4 column. Once that has been populated in the excel spreadsheet, you would load the items into [[SSMT]] to update the dictionary. This would complete this step. |
* For more information regarding this [[SSMT]] load, please refer to the [[SSMT: OID - Orderable Item Dictionary]] article. | * For more information regarding this [[SSMT]] load, please refer to the [[SSMT: OID - Orderable Item Dictionary]] article. | ||
| Line 48: | Line 53: | ||
# Select the [[Orderable Item]] dictionary | # Select the [[Orderable Item]] dictionary | ||
| − | * For more information regarding this dictionary, please refer to the [[Orderable Item]] Article. | + | * For more information regarding this dictionary, please refer to the [[Orderable Item]] Article. |
| − | |||
==Complete [[Orderable Item]] Synchronization== | ==Complete [[Orderable Item]] Synchronization== | ||
| Line 58: | Line 62: | ||
The first portion of this step is to define a primary vendor for each type of interface vendor used in your environment. For example, if you have lab tests completed by LabCorp and Quest and you have radiology tests performed by 3 different vendors, you would choose one primary vendor from each of the categories. The selection of this vendor should be based on a few things. | The first portion of this step is to define a primary vendor for each type of interface vendor used in your environment. For example, if you have lab tests completed by LabCorp and Quest and you have radiology tests performed by 3 different vendors, you would choose one primary vendor from each of the categories. The selection of this vendor should be based on a few things. | ||
* Compendium - The primary vendor chosen should be the one that provided the best compendium with the most complete and accurate information. You should also consider which compendium consists of the most tests and better fills the entire spectrum of tests requested in your organization. For example if there are a total of 1,000 unique tests performed in your organization, use the one that covers most of those items. There will be times when only the secondary vendor conducts a particular test, that is OK. | * Compendium - The primary vendor chosen should be the one that provided the best compendium with the most complete and accurate information. You should also consider which compendium consists of the most tests and better fills the entire spectrum of tests requested in your organization. For example if there are a total of 1,000 unique tests performed in your organization, use the one that covers most of those items. There will be times when only the secondary vendor conducts a particular test, that is OK. | ||
| − | * Utilization - It is typically best to | + | * Utilization - It is typically best to choose the vendor that is primarily used in your organization. If LabCorp is used 80% of the time, that may be the better candidate. |
| − | Based on | + | Based on these criteria, try to choose the best vendor as the primary. At the end of this exercise, the primary vendor will be the values populating the [[Orderable Item]] dictionary. You can't really make a wrong decision, but attempt to make the best decision. |
===Extract the OID dictionary=== | ===Extract the OID dictionary=== | ||
| Line 78: | Line 82: | ||
[[Image:OID-PerfLocIdentBlank.JPG]] | [[Image:OID-PerfLocIdentBlank.JPG]] | ||
| − | * The first step is to carry over all of the Primary Vendor Items for the specific category and place the [[Orderable Item]] | + | * The first step is to carry over all of the Primary Vendor Items for the specific category and place the [[Orderable Item]] EntryCode and the [[Orderable Item]] EntryName into the first two columns. This would result in a full list of your primary vendor's items. The synchronization process requires that you map primary vendor items to themselves so at this point, you would complete that portion of the setup. Copy all of the 'Order Item EntryCode' entries to the 'Performing Location Specific Order EntryCode' and the 'Performing Location Specific Order EntryMnemonic fields'. Next copy the 'Order Item EntryName' to the 'Performing Location Specific Order EntryName field'. Set the 'Performing Location EntryName' field to the EntryName for the performing location for your primary vendor. Finally set the 'Delete' column to 'N' for all entries. This will complete the setup for mapping the primary vendor to itself and the resulting spreadsheet should look like this: |
[[Image:OID-PerfLocIdentPrimary.JPG]] | [[Image:OID-PerfLocIdentPrimary.JPG]] | ||
| Line 90: | Line 94: | ||
* This process is going to tell the system based on the performing location, which code to associate to the Order. The example above shows that if a TSH is ordered and the performing location is LabCorp, the code sent will be 004259L. If the TSH test was ordered through Quest, the code would be sent as 899Q. | * This process is going to tell the system based on the performing location, which code to associate to the Order. The example above shows that if a TSH is ordered and the performing location is LabCorp, the code sent will be 004259L. If the TSH test was ordered through Quest, the code would be sent as 899Q. | ||
| − | * Repeat this process for all of your lab vendors and associate all of the tests that you can. If you have codes from your secondary vendors that still remain and there are no proper matches in the primary | + | * Repeat this process for all of your lab vendors and associate all of the tests that you can. If you have codes from your secondary vendors that still remain and there are no proper matches in the primary vendor's compendium, you would use the secondary test as the primary. In that case, you would load the secondary test into the [[SSMT: Order Performing Facility Identifiers|Order Performing Facility Identifier]] spreadsheet mapped to itself. You would note that this test is not mapped in your OID spreadsheet. |
===Load the [[SSMT: Order Performing Facility Identifiers|Order Performing Facility Identifier]] spreadsheet=== | ===Load the [[SSMT: Order Performing Facility Identifiers|Order Performing Facility Identifier]] spreadsheet=== | ||
| − | * Once the | + | * Once the spreadsheet is completed and all of the synchronization is complete, you would then load it into SSMT. To verify that the load completed successfully, you can do two things. |
* First you can extract the content category from [[SSMT]] and verify that all of the rows exist that you have entered. | * First you can extract the content category from [[SSMT]] and verify that all of the rows exist that you have entered. | ||
* The second is to log into Enterprise EHR as a user with access to TWAdmin. | * The second is to log into Enterprise EHR as a user with access to TWAdmin. | ||
| Line 103: | Line 107: | ||
# Highlight one of the performing locations that you synchronized to verify that it loaded properly. As you highlight it, the bottom portion of the screen should show exactly what is loaded for that particular identifier. It should look like the image below: | # Highlight one of the performing locations that you synchronized to verify that it loaded properly. As you highlight it, the bottom portion of the screen should show exactly what is loaded for that particular identifier. It should look like the image below: | ||
[[Image:OID-PerformingLocationIdentifiers.JPG]] | [[Image:OID-PerformingLocationIdentifiers.JPG]] | ||
| − | * This screen can also be used to input the value. In the future if you need to synchronize a small number of | + | * This screen can also be used to input the value. In the future if you need to synchronize a small number of tests, this would be the place to enter them. |
| + | |||
| + | ===Inactivate the secondary OID items=== | ||
| + | * Once the performing location identifiers have been loaded, you can now inactivate the secondary OID items that were mapped to the primary vendor. If you have properly identified the mapped items in the [[SSMT: OID - Orderable Item Dictionary|Orderable Item Spreadsheet]] you can use that as the identifying character. Remove all items from the spreadsheet that have not been mapped and are truly primary items. The remaining list of [[Orderable Item|Orderable Items]] that have been mapped to the primary vendor can now be marked as inactive in the spreadsheet. When this is complete, load the spreadsheet into [[SSMT]]. | ||
| − | |||
| − | |||
| − | |||
==OCD/OID Mapping== | ==OCD/OID Mapping== | ||
| − | + | Once the OID dictionary synchronization is complete, you can begin the process of mapping the OID to the OCD. This process links the OCD defined items in [[CareGuides]] to your OID items and also allows for the loading of the Allscripts delivered specialty favorites. An OCD item can only be mapped to one OID item, which should be OK if the synchronization process has been completed properly. If you find that an OCD item needs to be tied to more than one OID item, you should go back and synchronize those OID items. | |
| − | |||
| − | |||
| − | |||
| − | + | The goal is to map as many OCD items as you can. The focus should be to associate OCD items to OID items. Not all OID items will be used. | |
| − | # | + | |
| + | It is best to have this step completed by a Lab specialist or someone that has a deep understanding of the items that need to be mapped. Many items may have differing names, but mean the same thing. | ||
| + | |||
| + | ===Complete the Automated Mapping process=== | ||
| + | Allscripts delivers a tool that uses certain identifiers such as CPT4, LOINC and others to determine if an OID item matches a particular OCD item. This method requires that the OCD already contains delivered CPT4 codes and that only one unique CPT4 code is designated for each Orderable Item Dictionary entry. If two or more items have the same code, then mapping to any concept does not occur. The effectiveness of this process varies from client to client. To run this utility: | ||
| + | |||
| + | # Log in as TWAdmin | ||
# Select Concept mapping from the Vertical Toolbar. | # Select Concept mapping from the Vertical Toolbar. | ||
# Select the Radio button for OCD based mapping | # Select the Radio button for OCD based mapping | ||
| Line 128: | Line 135: | ||
# [[Image: OCD5.jpg]] | # [[Image: OCD5.jpg]] | ||
| − | + | ===Complete the Manual Mapping Process=== | |
| − | * | + | *At this point a portion of the mapping is complete due to the automated process, but the remaining items need to be manually mapped by an expert that understands the OID items. |
| − | + | ||
| + | * The mapping should be done by priority. The OCD Mapping page within TWAdmin has filters built in to help with this process. We would recommend doing items in this order: | ||
# Unmapped v11 CareGuide Items (when purchased) | # Unmapped v11 CareGuide Items (when purchased) | ||
| − | # Unmapped v10 HMP Items | + | # Unmapped v10 HMP Items |
| − | # | + | # High Priority Items (This is based on the number of Items that have been ordered in the past) |
| − | + | # Unmapped Order Favorite | |
| − | + | # Unmapped Items | |
| − | + | ||
| − | # | + | * To complete the mapping process follow these steps: |
| − | # Unmapped | ||
| − | |||
| − | |||
# From within TWAdmin, Navigate to (Concept Mapping, OCD Mapping) | # From within TWAdmin, Navigate to (Concept Mapping, OCD Mapping) | ||
# Select the OCD Based Mapping radio button | # Select the OCD Based Mapping radio button | ||
| Line 148: | Line 153: | ||
# Select an OCD Item from the left hand window to map | # Select an OCD Item from the left hand window to map | ||
# Search for the corresponding OID item in the right hand window | # Search for the corresponding OID item in the right hand window | ||
| + | # Highlight the corresponding OID Item | ||
# Click on the Map button | # Click on the Map button | ||
| − | + | [[Image: OCD6.jpg]] | |
| − | |||
| − | + | ||
| − | Once mapping is complete | + | ===Other Considerations=== |
| + | |||
| + | * For Items contained in the OCD that are not in your Orderable Item Dictionary, select the item in the OCD window and click on the clone button to copy the item to the OID and map it. This only needs to be done if the item is needed in your system. | ||
| + | |||
| + | * If you complete the OCD mapping and have remaining OID items, that is OK. The OCD items delivered are all of the items that AHS uses in predefined content delivered with the system. The extra OID items will still work within the system as expected and if desired can be added to CareGuides. | ||
| + | |||
| + | |||
| + | ===Custom HMP Mapping=== | ||
| + | In many cases, clients added to the HMP dictionary in v10. If that is the case in your organization please refer to the [[Map HMP Dictionary Entries to OID]] article. This also further describes the HMP mapping process in general. | ||
| + | |||
| + | |||
| + | ===Once mapping is complete=== | ||
* Activate CareGuides (if purchased) | * Activate CareGuides (if purchased) | ||
* Apply the delivered Order Favorites by Specialty | * Apply the delivered Order Favorites by Specialty | ||
| Line 159: | Line 175: | ||
==SSMT== | ==SSMT== | ||
| − | Use SSMT to migrate mapping configuration from one TouchWorks environment to | + | Use SSMT to migrate mapping configuration from one TouchWorks environment to another such as from test to production. The CMT tool can also now be used to migrate these dictionaries. |
| − | * Category name: OID_OCD Mapping | + | |
| + | * Category name: [[SSMT: OID_OCD Mapping|OID_OCD Mapping]] | ||
*Follow the directions on this link: [[SSMT 101: How to load and and extract using SSMT|Click Here for SSMT Page]] to Migrate the OID/OCD mapping | *Follow the directions on this link: [[SSMT 101: How to load and and extract using SSMT|Click Here for SSMT Page]] to Migrate the OID/OCD mapping | ||
| + | |||
| + | Return to [[V10 to V11.2 Build Workbook (BW)]] | ||
Latest revision as of 16:44, 15 July 2013
Version Information
- Article Created based on version: 11.1.4 HF #4
- Last Updated with version:
Description
This article describes the OID Synchronization and OCD mapping steps for a v10 to v11 upgrade client. A new v11 client install should refer to the V11 Order and Result Dictionary Build and Synchronization Article.
Mapping Orderable Items to Orderable Concepts is necessary for CareGuides, Order and some of the automated features of the software. This mapping allows the delivered content such as CareGuides and Specialty Favorites to be continually updated without an additional work effort by the system administrator.
- Orderable Concepts are the generic standard names for all orderable items within the TouchWorks system and are defined and delivered by Allscripts.
- Orderable Items are the items that your organization has loaded based on the varying vendors used for Results interfaces.
- A professional familiar with the individual OID items needs to do the mapping, this is typically a person with lab experience.
For complex issues related to this process see Advanced Order Set-Up
The following steps must be completed in order:
Populate Requested Performing Location Dictionary
The Requested Performing Location should have a value for each lab or procedure vendors used in your environment including in-house. This value is used to tell the system where to send orders and which Orderable code is associated to a particular test. This is heavily used during the synchronization process and should be reviewed and completed prior to moving to the next step. In many cases, this dictionary will have the appropriate values because they were defined in V10, but it does need to be reviewed for accuracy and to ensure all of the new options within the dictionary are defined properly.
Examples of entries in this dictionary include: a laboratory that you use for certain tests or locations that patients prefer to go to for procedures that must be performed off site.
There are two ways to populate this dictionary. The recommendation would be to populate it in the test system manually and use SSMT to move the dictionary to production during the go-live weekend.
Manual
- Log in as a user with access to the TWAdmin workplace.
- Navigate to the dictionaries tab
- Select the Requested Performing Location
- For information regarding the dictionary settings, please refer to the Requested Performing Location dictionary article.
SSMT
The SSMT content category for this dictionary is 'Performing Location'.
- For more information regarding the use of SSMT please refer to the SSMT page.
- For more information regarding the Performing Location Content Category, please refer to the SSMT: Performing Location article.
Populate Orderable Item Dictionary (OID)
The Orderable Item dictionary should have values from V10 if you are currently using Order or Results. The first step of the process is to ensure that you have the appropriate information in this dictionary and to gather any missing data from your vendors. The two things that need to be verified during this step are:
- Do you have the necessary Orderable Item entries in your system? If not, a compendium should be requested from your vendors.
- Do you have CPT4 codes associated to the Orderable Item dictionary items? If not, this should be requested from your vendors.
- If you are missing Orderable Item entries, you should gather the data, but ensure that you read the rest of the process before loading them. At the end of this exercise only the primary vendor codes will actually reside in the Orderable Item dictionary and to avoid extra effort, you should be familiar with the entire process.
- If you are missing the CPT4 codes, you would attempt to populate those for the primary vendor during this step. This is easiest using the SSMT tool. The CPT4 codes will assist with the mapping to the OCD dictionary, but it is not going to map all items. The success of this varies from client to client, but in most cases it'll assist with about 20% of the mapped values.
- Once you have the CPT4 codes, use SSMT to populate the codes in the system if this hasn't previously been done. This can be done using the content category of 'OID - Orderable Item Dictionary' and will be around the AA column (depending on version). If you are only adding CPT4 codes, you would extract the appropriate OID items from SSMT and populate the CPT4 column. Once that has been populated in the excel spreadsheet, you would load the items into SSMT to update the dictionary. This would complete this step.
- For more information regarding this SSMT load, please refer to the SSMT: OID - Orderable Item Dictionary article.
- This information can be reviewed in the UI by reviewing the dictionary. To complete this:
- Log in to the TWAdmin Workplace
- Navigate to the dictionaries tab
- Select the Orderable Item dictionary
- For more information regarding this dictionary, please refer to the Orderable Item Article.
Complete Orderable Item Synchronization
The Orderable Item dictionary synchronization step is required and provides a few benefits. The first benefit is to ensure that the end user can only see one item when ordering a test or a procedure. If this step isn't completed, they will see all items in the OID dictionary and this would cause confusion. The other reason is that OID items will need to be mapped to OCD items and you can only complete a one to one map of these items.
Choose a primary vendor
The first portion of this step is to define a primary vendor for each type of interface vendor used in your environment. For example, if you have lab tests completed by LabCorp and Quest and you have radiology tests performed by 3 different vendors, you would choose one primary vendor from each of the categories. The selection of this vendor should be based on a few things.
- Compendium - The primary vendor chosen should be the one that provided the best compendium with the most complete and accurate information. You should also consider which compendium consists of the most tests and better fills the entire spectrum of tests requested in your organization. For example if there are a total of 1,000 unique tests performed in your organization, use the one that covers most of those items. There will be times when only the secondary vendor conducts a particular test, that is OK.
- Utilization - It is typically best to choose the vendor that is primarily used in your organization. If LabCorp is used 80% of the time, that may be the better candidate.
Based on these criteria, try to choose the best vendor as the primary. At the end of this exercise, the primary vendor will be the values populating the Orderable Item dictionary. You can't really make a wrong decision, but attempt to make the best decision.
Extract the OID dictionary
- Using the SSMT tool, you should extract all of the tests in the Orderable Item dictionary. This is found in the Content Category of SSMT: OID - Orderable Item Dictionary.
- The SSMT tool allows you to extract the Orderable Item dictionary in categories. Usually this corresponds to different types of vendors, but not always. Keep the items separated into the specific categories unless a specific vendor crosses into multiple categories. If that is the case, it makes sense to combine them.
- Separate the primary vendor items from the secondary vendors and separate the spreadsheets. This will give you two discrete lists of items which you can use to assist with the mapping of items. The primary vendor list will be used to start the Order Performing Facility Identifier spreadsheet.
Begin the synchronization process
The step is where you associate the secondary vendors to the primary vendors. This is done by telling the system what the Order Identifiers are for each of the vendors in the system. Once you are done you would inactivate the secondary vendor OID items to ensure that only one item appears in the UI. To complete this follow these steps:
- Using SSMT extract the content category of 'Order Performing Facility Identifiers' and ensure that you grab the headers. This spreadsheet is explained in the SSMT: Order Performing Facility Identifiers article. This spreadsheet is basically asking you to input the primary vendor along with the associated secondary vendor. This is the step that tells the system which code to use based on the defined performing location.
The spreadsheet should look like this

- The first step is to carry over all of the Primary Vendor Items for the specific category and place the Orderable Item EntryCode and the Orderable Item EntryName into the first two columns. This would result in a full list of your primary vendor's items. The synchronization process requires that you map primary vendor items to themselves so at this point, you would complete that portion of the setup. Copy all of the 'Order Item EntryCode' entries to the 'Performing Location Specific Order EntryCode' and the 'Performing Location Specific Order EntryMnemonic fields'. Next copy the 'Order Item EntryName' to the 'Performing Location Specific Order EntryName field'. Set the 'Performing Location EntryName' field to the EntryName for the performing location for your primary vendor. Finally set the 'Delete' column to 'N' for all entries. This will complete the setup for mapping the primary vendor to itself and the resulting spreadsheet should look like this:

- At this point, you would begin to map the secondary vendor items from the original OID extraction. As things are mapped, it is best to add a column to the spreadsheet to identify which items have been mapped, but do not remove them. You will need to use this file to inactivate the entries once the mapping process is complete.
- To map the secondary items, you would begin by working through the extracted OID entries that have been defined as secondary items. For each of the items, you would determine which Orderable Item from the primary vendor that it corresponds to. As you make a match, you would add it as a new row to the Order Performing Facility Identifier spreadsheet. If your secondary vendor was quest, it would look similar to this:

- This process is going to tell the system based on the performing location, which code to associate to the Order. The example above shows that if a TSH is ordered and the performing location is LabCorp, the code sent will be 004259L. If the TSH test was ordered through Quest, the code would be sent as 899Q.
- Repeat this process for all of your lab vendors and associate all of the tests that you can. If you have codes from your secondary vendors that still remain and there are no proper matches in the primary vendor's compendium, you would use the secondary test as the primary. In that case, you would load the secondary test into the Order Performing Facility Identifier spreadsheet mapped to itself. You would note that this test is not mapped in your OID spreadsheet.
Load the Order Performing Facility Identifier spreadsheet
- Once the spreadsheet is completed and all of the synchronization is complete, you would then load it into SSMT. To verify that the load completed successfully, you can do two things.
- First you can extract the content category from SSMT and verify that all of the rows exist that you have entered.
- The second is to log into Enterprise EHR as a user with access to TWAdmin.
- Navigate to the dictionaries tab and select the Orderable Item Dictionary.
- Find the primary Orderable Item entry
- On the bottom half of the screen, find the link 'Requested Performing Location Identifiers'.
- Select the link. This will launch another window.
- The top half of the screen asks you to search for the performing location. It is usually best to just push the search button and show all Performing Locations.
- Highlight one of the performing locations that you synchronized to verify that it loaded properly. As you highlight it, the bottom portion of the screen should show exactly what is loaded for that particular identifier. It should look like the image below:

- This screen can also be used to input the value. In the future if you need to synchronize a small number of tests, this would be the place to enter them.
Inactivate the secondary OID items
- Once the performing location identifiers have been loaded, you can now inactivate the secondary OID items that were mapped to the primary vendor. If you have properly identified the mapped items in the Orderable Item Spreadsheet you can use that as the identifying character. Remove all items from the spreadsheet that have not been mapped and are truly primary items. The remaining list of Orderable Items that have been mapped to the primary vendor can now be marked as inactive in the spreadsheet. When this is complete, load the spreadsheet into SSMT.
OCD/OID Mapping
Once the OID dictionary synchronization is complete, you can begin the process of mapping the OID to the OCD. This process links the OCD defined items in CareGuides to your OID items and also allows for the loading of the Allscripts delivered specialty favorites. An OCD item can only be mapped to one OID item, which should be OK if the synchronization process has been completed properly. If you find that an OCD item needs to be tied to more than one OID item, you should go back and synchronize those OID items.
The goal is to map as many OCD items as you can. The focus should be to associate OCD items to OID items. Not all OID items will be used.
It is best to have this step completed by a Lab specialist or someone that has a deep understanding of the items that need to be mapped. Many items may have differing names, but mean the same thing.
Complete the Automated Mapping process
Allscripts delivers a tool that uses certain identifiers such as CPT4, LOINC and others to determine if an OID item matches a particular OCD item. This method requires that the OCD already contains delivered CPT4 codes and that only one unique CPT4 code is designated for each Orderable Item Dictionary entry. If two or more items have the same code, then mapping to any concept does not occur. The effectiveness of this process varies from client to client. To run this utility:
- Log in as TWAdmin
- Select Concept mapping from the Vertical Toolbar.
- Select the Radio button for OCD based mapping
- Filter by all unmapped Items
- Click on
 in the bottom left hand corner of the screen.
 - When prompted by the Automate Confirmation box, click Yes.
- A status bar will appear to show the mapping progress.
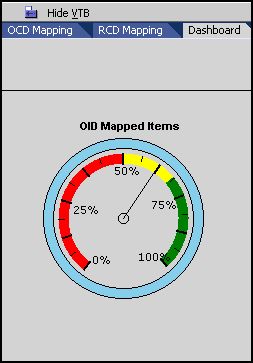
- You can see how much mapping is complete by checking the Dashboard tab.


Complete the Manual Mapping Process
- At this point a portion of the mapping is complete due to the automated process, but the remaining items need to be manually mapped by an expert that understands the OID items.
- The mapping should be done by priority. The OCD Mapping page within TWAdmin has filters built in to help with this process. We would recommend doing items in this order:
- Unmapped v11 CareGuide Items (when purchased)
- Unmapped v10 HMP Items
- High Priority Items (This is based on the number of Items that have been ordered in the past)
- Unmapped Order Favorite
- Unmapped Items
- To complete the mapping process follow these steps:
- From within TWAdmin, Navigate to (Concept Mapping, OCD Mapping)
- Select the OCD Based Mapping radio button
- Select a Filter to view a subset of unmapped items
- items that appear in blue text have been successfully mapped
- Select an OCD Item from the left hand window to map
- Search for the corresponding OID item in the right hand window
- Highlight the corresponding OID Item
- Click on the Map button

Other Considerations
- For Items contained in the OCD that are not in your Orderable Item Dictionary, select the item in the OCD window and click on the clone button to copy the item to the OID and map it. This only needs to be done if the item is needed in your system.
- If you complete the OCD mapping and have remaining OID items, that is OK. The OCD items delivered are all of the items that AHS uses in predefined content delivered with the system. The extra OID items will still work within the system as expected and if desired can be added to CareGuides.
Custom HMP Mapping
In many cases, clients added to the HMP dictionary in v10. If that is the case in your organization please refer to the Map HMP Dictionary Entries to OID article. This also further describes the HMP mapping process in general.
Once mapping is complete
- Activate CareGuides (if purchased)
- Apply the delivered Order Favorites by Specialty
SSMT
Use SSMT to migrate mapping configuration from one TouchWorks environment to another such as from test to production. The CMT tool can also now be used to migrate these dictionaries.
- Category name: OID_OCD Mapping
- Follow the directions on this link: Click Here for SSMT Page to Migrate the OID/OCD mapping
Return to V10 to V11.2 Build Workbook (BW)