Difference between revisions of "V11 Note Basic Build"
Jump to navigation
Jump to search
| (11 intermediate revisions by 5 users not shown) | |||
| Line 1: | Line 1: | ||
| + | [[Category:Allscripts Touchworks EHR v11 Note]] | ||
| + | __TOC__ | ||
==Description== | ==Description== | ||
This page is designed to walk the user through the very ''basic'' steps in building a V11 Note. | This page is designed to walk the user through the very ''basic'' steps in building a V11 Note. | ||
| − | + | ''Note:'' [[Note Admin]] will '''NOT''' warn you about losing '''unsaved changes''', so be sure to save changes once they are complete. | |
==Instructions== | ==Instructions== | ||
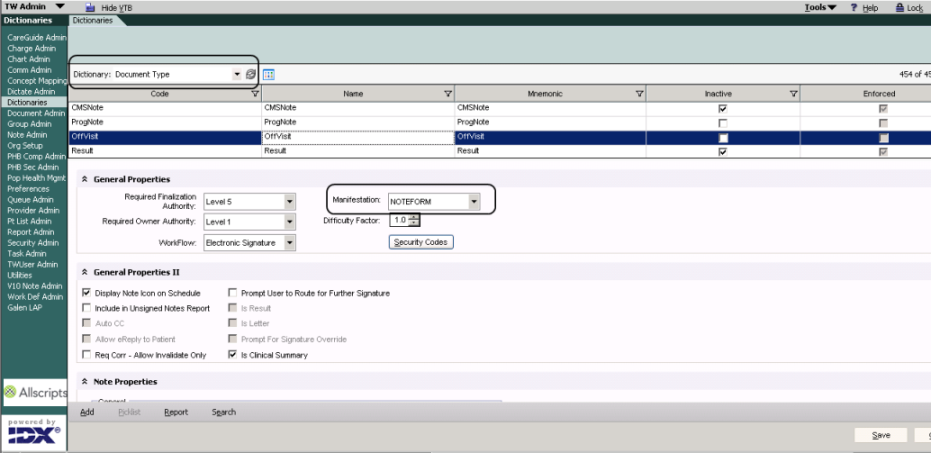
| − | #You must first go to TWAdmin > Dictionaries > Document Type dictionary where you add your new Note (Document Type). | + | #You must first go to [[TWAdmin]] > [[Dictionaries]] > [[Document Type]] dictionary where you add your new Note ([[Document Type]]). |
| − | #Click the '''Add''' button and complete all the needed Property fields much like you have done creating other types of Documents. The '''Manifestation''' for a V11 Note is '''"NOTEFORM | + | #Click the '''Add''' button and complete all the needed Property fields much like you have done creating other types of Documents. The '''Manifestation''' for a V11 Note is '''"NOTEFORM'''." |
#:[[Image:V11 Note Basic Build DT NOTEFORM.png]] | #:[[Image:V11 Note Basic Build DT NOTEFORM.png]] | ||
| − | #Now you are ready to build the body of this new V11 Note. From '''TWAdmin''' go to '''Note Admin'''. Then Click on the HTB, click on '''Note Admin'''. | + | #Now you are ready to build the body of this new V11 Note. From '''TWAdmin''' go to '''[[Note Admin]]'''. Then Click on the HTB, click on '''[[Note Admin]]'''. |
| − | #Now you build the Note Input Template. ''(please note, that Note Input Templates are not part of the Delivered Clinical Content...you must build these for each Note Type desired | + | #Now you build the Note Input Template. ''(please note, that Note Input Templates are not part of the Delivered Clinical Content...you must build these for each Note Type desired and once built, they can be copied and modified, however duplicate input templates can not be assigned to a specialty twice. If this is attempted, the system will display a message indicating its a duplicate at which point the assigned specialtie(s) will need to be modified OR the input will need to be attached to a different document type before being able to save it. )''. |
| − | #From this Note Admin screen, click on the '''Note Templates''' tab and click '''New Input''', located at the bottom of this screen. | + | #From this [[Note Admin]] screen, click on the '''Note Templates''' tab and click '''New Input''', located at the bottom of this screen. |
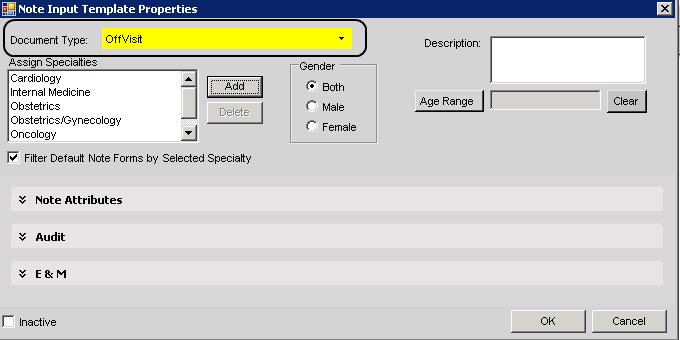
#The '''Note Input Template Properties''' dialog box will display. The Document Type field will appear in Yellow...click the dropdown and choose the Document Type that you just built in your Document Type dictionary. | #The '''Note Input Template Properties''' dialog box will display. The Document Type field will appear in Yellow...click the dropdown and choose the Document Type that you just built in your Document Type dictionary. | ||
#:[[Image:V11 Note Basic Build DT NoteInput.png]] | #:[[Image:V11 Note Basic Build DT NoteInput.png]] | ||
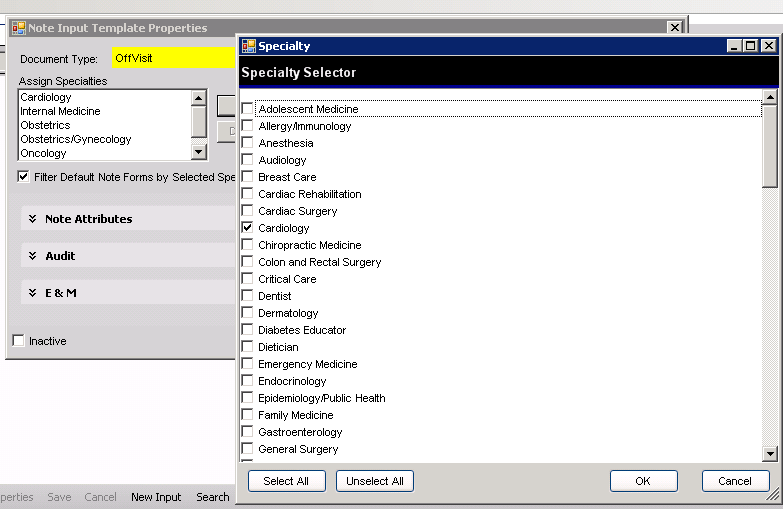
| − | #Click '''Add''' to add your Specialty...and complete your Description Field. Then click '''OK'''. | + | #Click '''Add''' to add your [[Specialty]]...and complete your Description Field (Note that this is the field seen by CMT so a good description will go a long way in making it easier to figure out which note templates need to be moved via CMT). Then click '''OK'''. |
#:[[Image:V11 Note Basic Build Assign Specialty.png]] | #:[[Image:V11 Note Basic Build Assign Specialty.png]] | ||
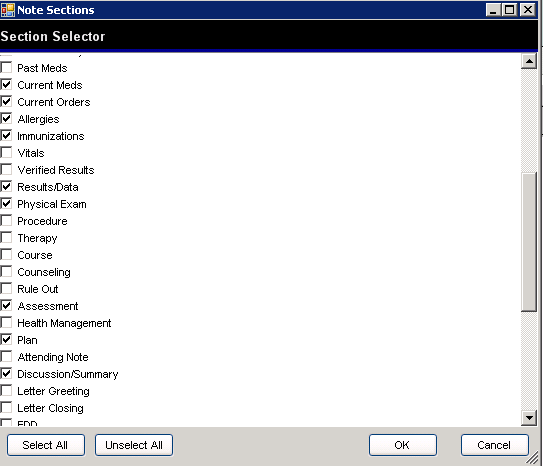
#Once you click '''OK'''...the Note Sections/Section Selector screen will appear. From here you put a check in the box of all the sections you want included in your note and again, click '''OK'''. | #Once you click '''OK'''...the Note Sections/Section Selector screen will appear. From here you put a check in the box of all the sections you want included in your note and again, click '''OK'''. | ||
#:[[Image:V11 Note Basic Build Note Sections.PNG]] | #:[[Image:V11 Note Basic Build Note Sections.PNG]] | ||
| − | #Each section of your note will appear on the left side of the screen. From here you can move the sections by right-clicking on the section and choosing to move it Up or Down. | + | #Each section of your note will appear on the left side of the screen. From here you can move the sections by right-clicking on the section and choosing to move it Up or Down. You can also right click on a Note Section to Rename it. |
#:[[Image:V11 Note Basic Build Sections Left.png]] | #:[[Image:V11 Note Basic Build Sections Left.png]] | ||
#As well, click on each section and complete the section detail information. For example: adding Note Forms for Review of Systems and/or Physical Exam, Auto-cite information, Annotation, etc. | #As well, click on each section and complete the section detail information. For example: adding Note Forms for Review of Systems and/or Physical Exam, Auto-cite information, Annotation, etc. | ||
| Line 24: | Line 26: | ||
#:[[Image:V11 Note Basic Build Output.PNG]] | #:[[Image:V11 Note Basic Build Output.PNG]] | ||
| − | ''Note:'' this is a very basic note, using just the delivered items, but it is a good place to at least start to understand | + | ''Note:'' this is a very basic note, using just the delivered items, but it is a good place to at least start to understand V11 Note. From here you can [[Editing Note Forms|Edit Note Forms]], [[Create_multiple_output_templates|create multiple Output Templates]] for one Input Template, Edit Header and Footer information, etc. |
| + | |||
| + | ==Additional Information== | ||
| + | |||
| + | *[[Creating_a_Note_Input_Template | Create a result verification note]] | ||
| + | *[[Advanced Note Form Build]] | ||
Latest revision as of 12:36, 29 October 2014
Description
This page is designed to walk the user through the very basic steps in building a V11 Note.
Note: Note Admin will NOT warn you about losing unsaved changes, so be sure to save changes once they are complete.
Instructions
- You must first go to TWAdmin > Dictionaries > Document Type dictionary where you add your new Note (Document Type).
- Click the Add button and complete all the needed Property fields much like you have done creating other types of Documents. The Manifestation for a V11 Note is "NOTEFORM."
- Now you are ready to build the body of this new V11 Note. From TWAdmin go to Note Admin. Then Click on the HTB, click on Note Admin.
- Now you build the Note Input Template. (please note, that Note Input Templates are not part of the Delivered Clinical Content...you must build these for each Note Type desired and once built, they can be copied and modified, however duplicate input templates can not be assigned to a specialty twice. If this is attempted, the system will display a message indicating its a duplicate at which point the assigned specialtie(s) will need to be modified OR the input will need to be attached to a different document type before being able to save it. ).
- From this Note Admin screen, click on the Note Templates tab and click New Input, located at the bottom of this screen.
- The Note Input Template Properties dialog box will display. The Document Type field will appear in Yellow...click the dropdown and choose the Document Type that you just built in your Document Type dictionary.
- Click Add to add your Specialty...and complete your Description Field (Note that this is the field seen by CMT so a good description will go a long way in making it easier to figure out which note templates need to be moved via CMT). Then click OK.
- Once you click OK...the Note Sections/Section Selector screen will appear. From here you put a check in the box of all the sections you want included in your note and again, click OK.
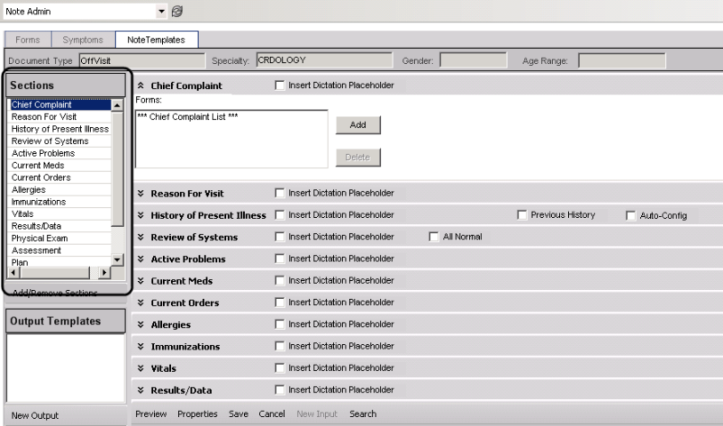
- Each section of your note will appear on the left side of the screen. From here you can move the sections by right-clicking on the section and choosing to move it Up or Down. You can also right click on a Note Section to Rename it.
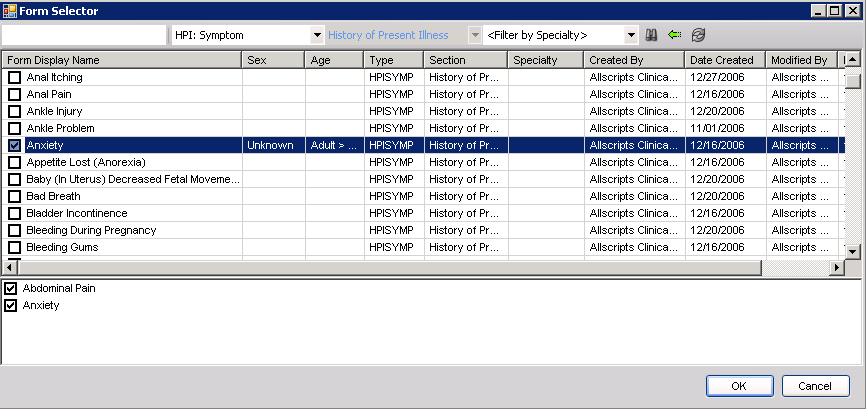
- As well, click on each section and complete the section detail information. For example: adding Note Forms for Review of Systems and/or Physical Exam, Auto-cite information, Annotation, etc.
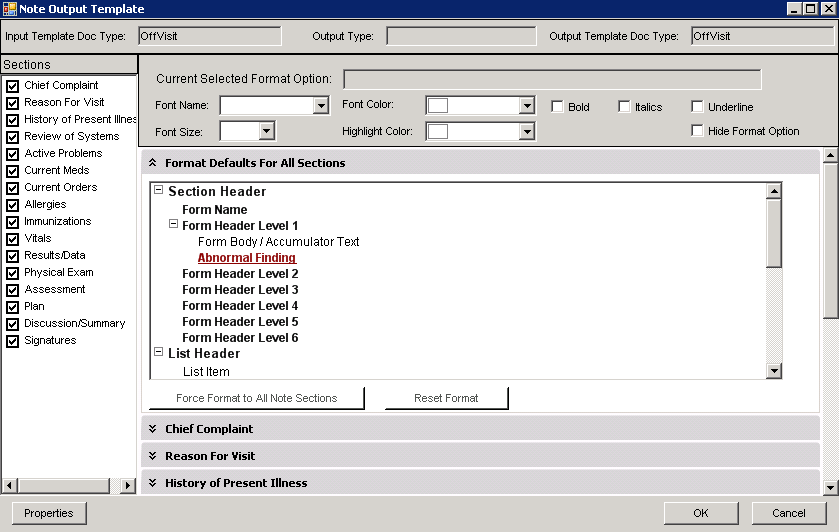
- Once you have completed the Note Input Template, you must build the Note Output Template. From this Newly created Note Input Template, click on New Output in the far left corner of your screen. Your current Note Type will default in the Note Output Template Name. Click on the first section to activate the OK button and click OK.....and SAVE.
Note: this is a very basic note, using just the delivered items, but it is a good place to at least start to understand V11 Note. From here you can Edit Note Forms, create multiple Output Templates for one Input Template, Edit Header and Footer information, etc.
