Difference between revisions of "V11 Note Result Letter Configuration"
Max.Stroud (talk | contribs) m (Result Letter Print moved to V11 Note Result Letter Configuration) |
Max.Stroud (talk | contribs) |
||
| Line 5: | Line 5: | ||
[[Image:rv1.jpg]] | [[Image:rv1.jpg]] | ||
| − | Step 2: Go and put in a Result Letter for v11 in the Document Type. Go to Dictionary> Document Type> Add Result Letter | + | |
| + | Step 2: Go to Dictionary> Document Type | ||
| + | Create a new Document titled Patient Letter (this is in order to have a Parent Form to select below) | ||
| + | |||
| + | Step 3: Go and put in a Result Letter for v11 in the Document Type. Go to Dictionary> Document Type> Add Result Letter | ||
[[Image:reslet2.jpg]] | [[Image:reslet2.jpg]] | ||
Revision as of 14:27, 19 September 2008
Below are the steps to set up result verification using v11 Note for the Result Letter while all other Notes are v10.
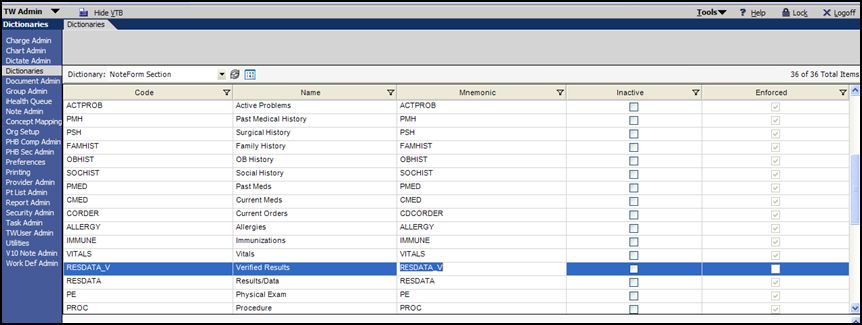
Step 1: Make sure the Verified Results are an available option on the Noteform input section. Go to Dictionary> Noteform Section> Verified Results. This should already be there if not add it.
Step 2: Go to Dictionary> Document Type
Create a new Document titled Patient Letter (this is in order to have a Parent Form to select below)
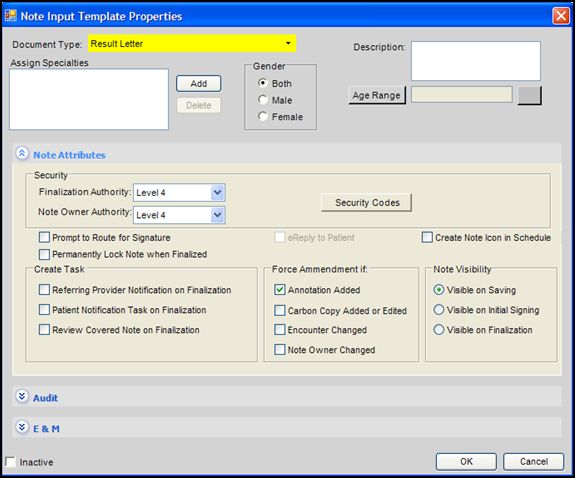
Step 3: Go and put in a Result Letter for v11 in the Document Type. Go to Dictionary> Document Type> Add Result Letter
Typical settings(in the properties windows below the dictionary window 0 should be:
- Manifestation= Noteform
- Required Finalization and Owner Authority must be filled in
- Workflow= Electronic Signature
- Check subtype, Parent Form: Patient Letter (optional)
- Finalize Note on Saving= check this if you don’t want a sign note task
- Note visibility= on saving
- Include on unsigned note report
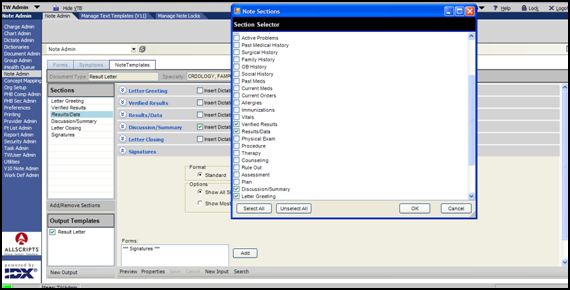
Step 3: Build Result Letter Note- Go to Note Admin> Note template> Add New Input> Result Letter
Begin to select the all the possible Note sections you’d like to see in the output and include them in the input.
Verified Results has to be included.
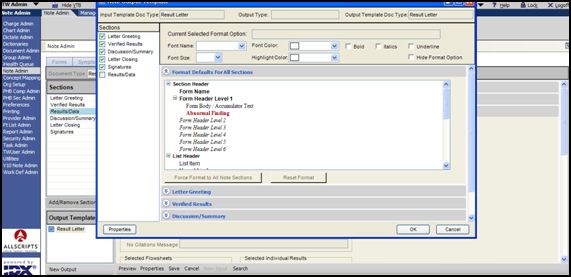
Build the Note Output (what is seen in the patient’s chart): Put sections in the order you’d like, section names can be renamed per customer request as well as font. Go to Output template and select New Output.
Click Save.
Step 4: Go to preferences: Follow the Release Documentation on v11.1.1 for General and Results Verification preferences for the result verification redesign. It is written completely on how to set up the preferences in v11.1.1 result verification redesign.
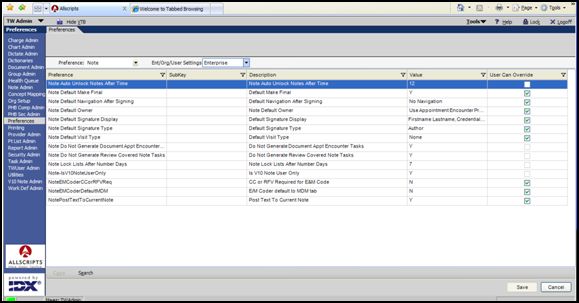
Go to Preferences> Note> Preference is v10 Note only user=Enterprise level=Y
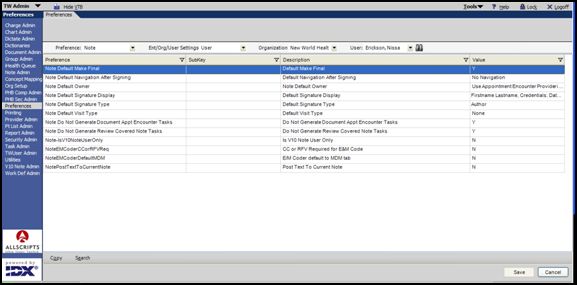
Then select User> Organization> username> Select N to v10 Note only user:
You can enter all users that will need access to result letter in via a SSMT load instead of manually selecting each user and changing the v10 Note Only user preference.
This will make the v11 Result Letter automatically pull in during the result verification process.
There are additional two options you can set up.
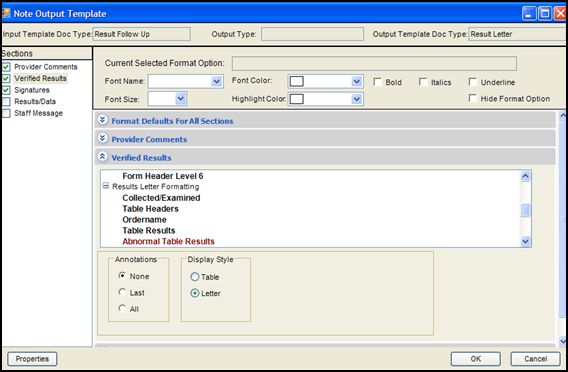
Option 1- Under Verified Results- you can choose Table or Letter format:
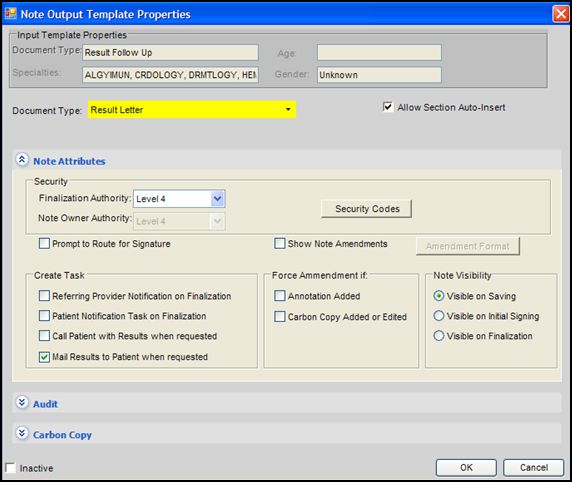
Option 2- ability to select which task is associated with the which Note output:
