V11 Result Note for Upgrade
When Upgrading from V10 to V11, Upgrade clients will initially go-live on V11 while using V10 note and V11 note will be implemented in Phase 2 of the upgrade. The one exception to this is for Results documentation. The reason for this exception is that the V10 result note does not format correctly when using data from your V11 system - specifically, results and reference ranges do not line up correctly. In order to avoid this issue, clients build a V11 note for results verification only. Typically this consists of one input template and two output templates - one output that creates a V11 note for the patient file and an output template that creates a letter to the patient with the verified results.
Inactivate the V10 Result Note
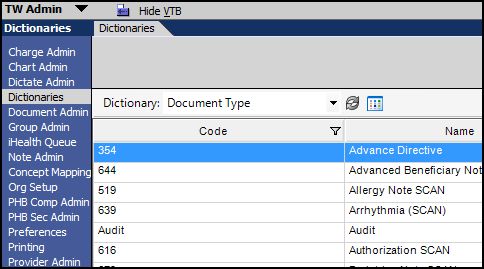
- Navigate to the TWAdmin workspace
- Select Dictionaries from the Vertical Toolbar
- Select the Document Type Dictionary
- Click "search" in the lower left hand section of the screen.
- Seach for the document type "Result" and confirm that it's Manifestation is "RTF" and not "NoteForm". This is the v10 Result Verification note.
- Select "inactivate"
- Save
Build a V11 Result Note
Create New Document Types
For most clients we are recommending creating two document types, One document type for the Result Note for the Chart and one for the Result Letter to the patient. The settings for these two document types will be the same except for the Code, Name and Mnemonic. They will both be tied to the same input template.
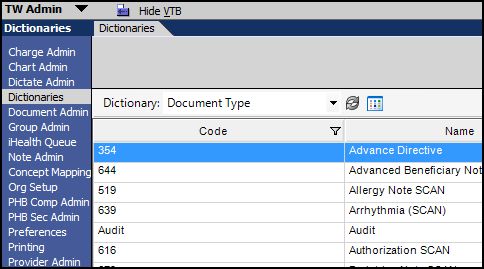
- Navigate to the TWAdmin workspace
- Select Dictionaries from the Vertical Toolbar
- Select the Document Type Dictionary
- Select Add from the left hand section of the screen. This will give you a blank line to enter the name of your document type
- Enter the Code, Name and Mnemonic
- Doc type 1: NWHRCN, Result Chart Note, NWHRCN
- Doc type 2: NWHRL, Result Letter, NWHRL
- In the Detail Section enter the following
General Properties
- Manifestation= Noteform
- Required Finalization and Owner Authority must be filled in
- Workflow= Electronic Signature
General properties II
- Include on unsigned note report
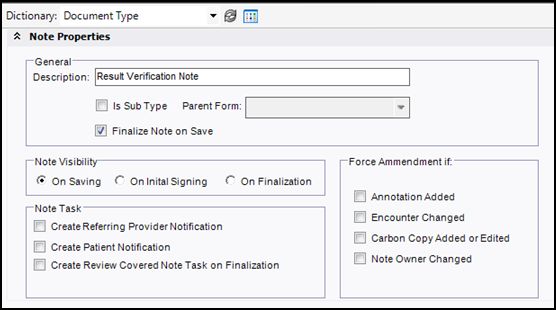
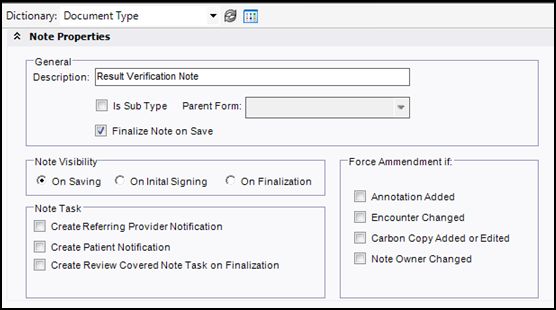
Note Properties
- Finalize Note on Saving= check this if you don’t want a sign note task
- Note visibility= on saving
- Click save on the lower right hand section of the screen.
repeat this step so that you have 2 new NOTEFORM document types, one for Result Note and one for Result Letter
Create Input Template
- Navigate to the TWAdmin workspace
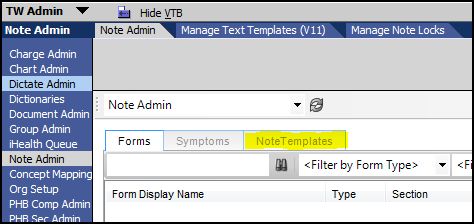
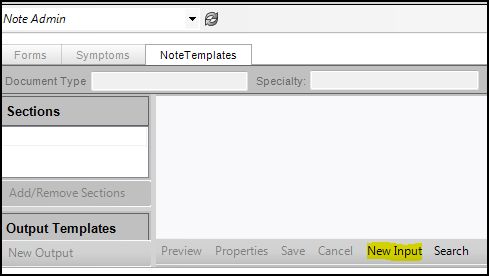
- Select Note Admin from the Vertical Toolbar
- Select the tab in Note Admin for NoteTemplates
- Select "New Input"
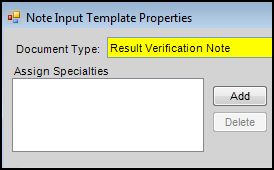
- "Note Input Template Properties" Window will appear
- select the document type that you created in the Document Type dictionary
- Select "Assign Specialties"
- Assign all specialties, click OK
- In the Detail section, all of the attributes that you created in the document type dictionary will default in. (In this example I changed the authority levels and added a Patient Notification task on Finalization)
- click OK
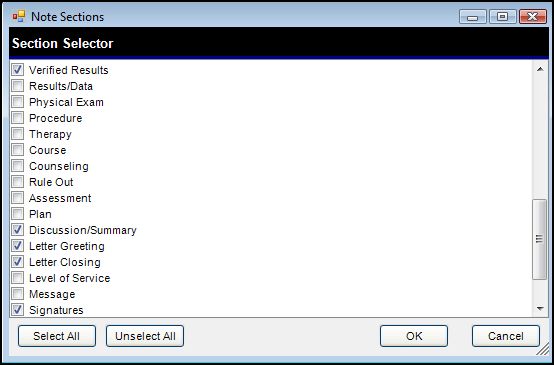
- Select the input sections that you want to have available for your note. Make sure to select "Verified Results" and not "Results/Data"
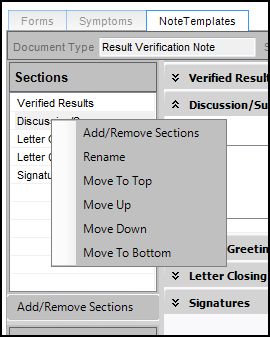
- To move sections of your note input up and down, right click on the note sections and move them into the order you would like to appear when you are authoring the note
- Add dictation placeholders where you would like to have them
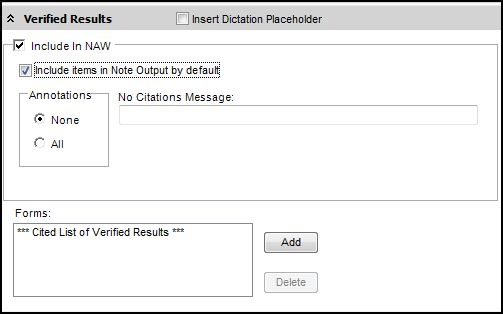
- In the Verified Results Detail area select:
- Include in NAW
- Include in Note output by default
- Decide if you would like to include annotations or not
- There will be a place in the detail area for sections for "forms". Leave these blank. This is where you would associate V11 Noteforms with a note. V11 Noteforms are currently not loaded with the V11 upgrade and will be loaded when you are ready to begin your full note implementation. Noteforms are not necessary for this Note.
- click save - you will be prompted to create an output template
Create Output Templates
You can have more than one Output template associated with an input template. Not all of the sections in the input template need to be populated in the output template. To complete the basic build for the V11 Note Result letter for upgrade, two outputs will be created - a note for the chart and a letter to send to patients.
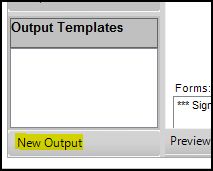
In the bottom right hand corner of the screen, select "New Output"
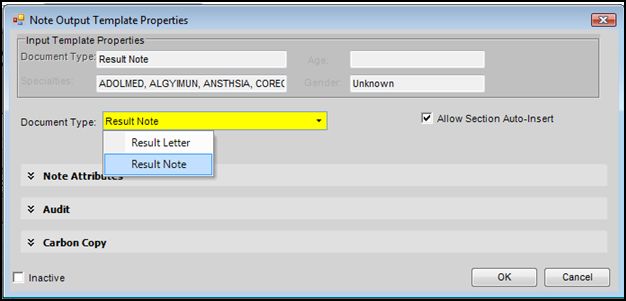
The Note Output Template Properties window will appear. Select the type of note output you would like to create first - This example uses the note for the chart.
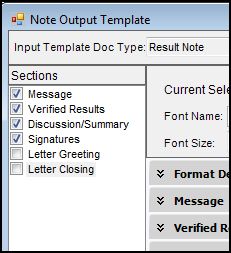
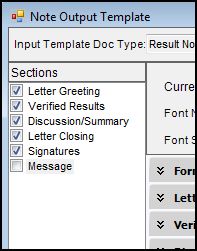
The Note Output Template window will appear. On the left hand side of the window select the components to be included in the output.
If you want to adjust the fonts or appearances of the note you can do that here. Then click OK.
Repeat the steps above to create an output template for the Result Letter to the Patient.
Click Save
Set Preferences Correctly for Result Workflow
Note preferences to use V10 Notes in a V11 environment need to be set exactly right in order to allow the use of the V11 Result Verification Letter.
Note Preferences:
- Is V10 Note User Only This preference is set counter-intuitively. At the Enterprise level this preference should be set to "Y", at a user level for all users verifying results, it is set to "N". Setting the preferences this way ensures throughout the normal workflow of the day providers are presented with the V10 Note Selector windows, but that when they go to verify results they are allowed to create a V11 Result note.
- Results Preferences
The preferences below determine how the note that is presented in the Results Verification Workflow. Make sure that the Result Verification Note Type is the same as the the input that you just created.
Click save.
Assign Note View to Users
Note Views are assigned to users in work Def Admin using the same process as Assign Clinical Desktop Views to Users
Follow the instructions on Assign Clinical Desktop Views to Users to assign Note Views to users. You can use SSMT to assign a basic Note View to all users.
Add Result Note to proper folder in Chart Admin so that it appears properly in Chart Viewer
From TWAdmn select Chart Admin from the Vertical Tool Bar. Select Manager sections from the Horizontal toolbar.
Double check to make sure that the tasks of "Call Patient with Results" and "Finish Note" are active.
From TWAdmin, do to Dictionaries, Task Name Dictionaries.
